Makeover Edition: DIY Vintage Glam Waterfall Chandelier
Can I just say that I am loving my bedroom makeover so far? This whole JANUARY CHALLENGE has kept me accountable for my goals for this month. I am just a few projects away from finishing this bedroom that I used to be indifferent about, including a stunning waterfall chandelier DIY.
I must say, this project that I am teaching you how to make today completely came from my imagination. It is my favorite bedroom project this month by far!
The issue I had was that I had zero light near my closet. I could never see what I was putting on in the morning. Now that I have my large wall mirror in my bedroom instead of my living room, I wanted to create a dressing room/vanity space with lighting! I wanted to make my morning routine a little more exciting and easy.

Of course, I did a little research and found some great inspiration on Pinterest, but the idea behind the construction of this chandelier was all mine. I had to get creative and like always I try to be as thrifty as possible with my supplies. Mostly, because I want anyone on any budget to be able to complete it!
I have also been reluctant to buy a chandelier since I moved into my apartment knowing that I could make one instead and share it here at A & C. The only problem was that I didn’t quite know how I would construct it.
If you haven’t seen my recent projects in this bedroom makeover edition series…
- Makeover Edition: DIY Upholstered Headboard Made For Free
- Makeover Edition: Easy No Sew Accent Pillow Room Decoration
- DIY Memo Board Ideas – An Inspiration Upcycle Project
- Makeover Edition: Bedroom with Vintage Glam Twist
- Easy DIY Metal Ottoman Glam Makeover
- Makeover Edition: Vintage Bedroom Dresser Makeover
- Makeover Edition: Window Dressing Install for My Bedroom
That’s where a little imagination came in. This is my favorite part of these types of projects. My friends and family give me the weirdest look sometimes when I tell them an idea I have for a project, solely because they cannot imagine it in their minds. The reason I love this is because of their reactions once I have completed the project! Polar opposite response.
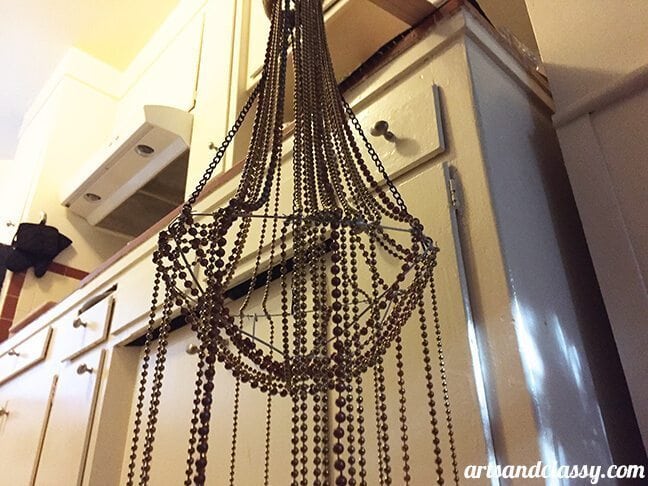
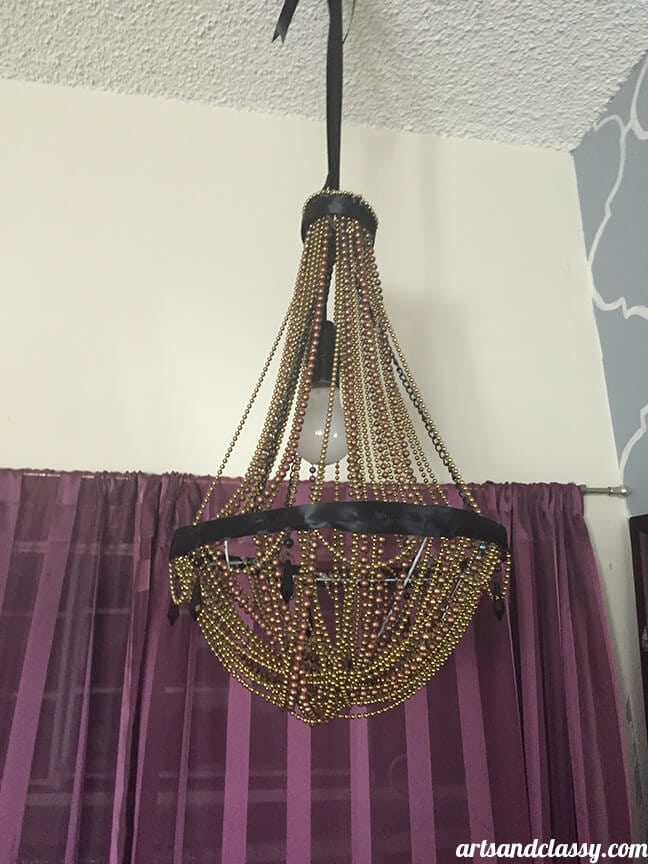
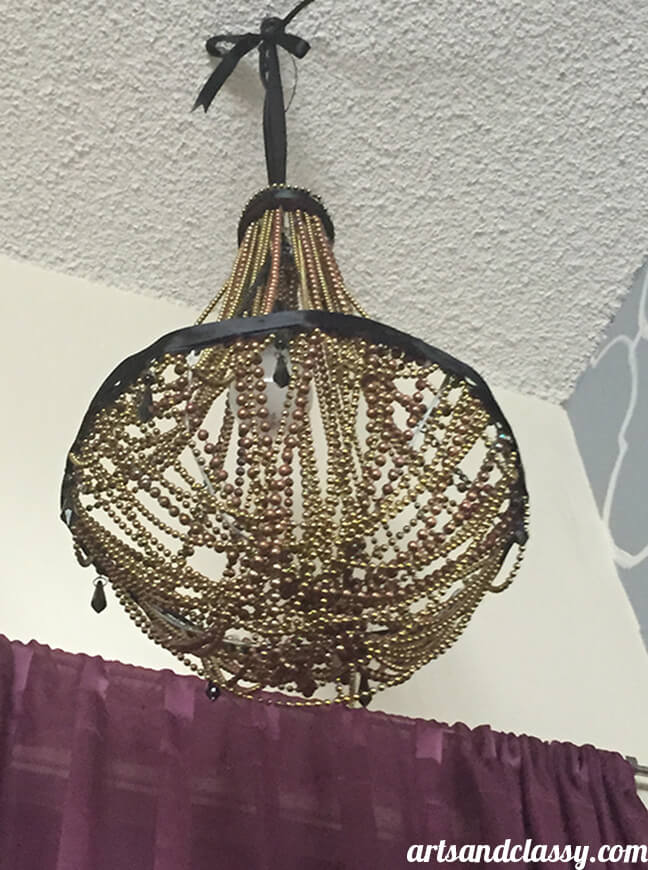
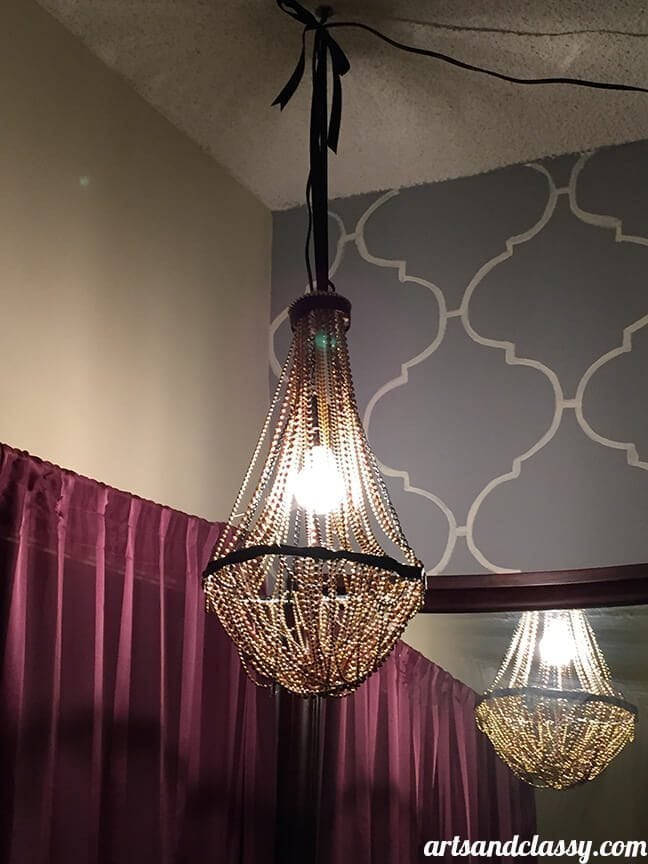
Here is the AFTER image of this waterfall chandelier diy!

If you love this project as much as I do and you want to try to make it. I will tell you, it took about 2.5 (part-time) days to make, but yet again cost me nothing but my time.
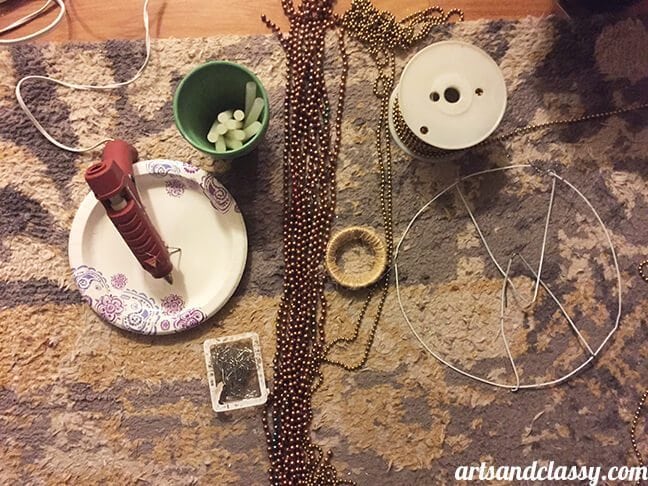
List of supplies needed for this waterfall chandelier diy:
- 2 wire coat hangers
- roll of beads
- tacky glue
- mason jar lid
- twine
- black ribbon
- pendant light kit
On to the tutorial.
Step 1
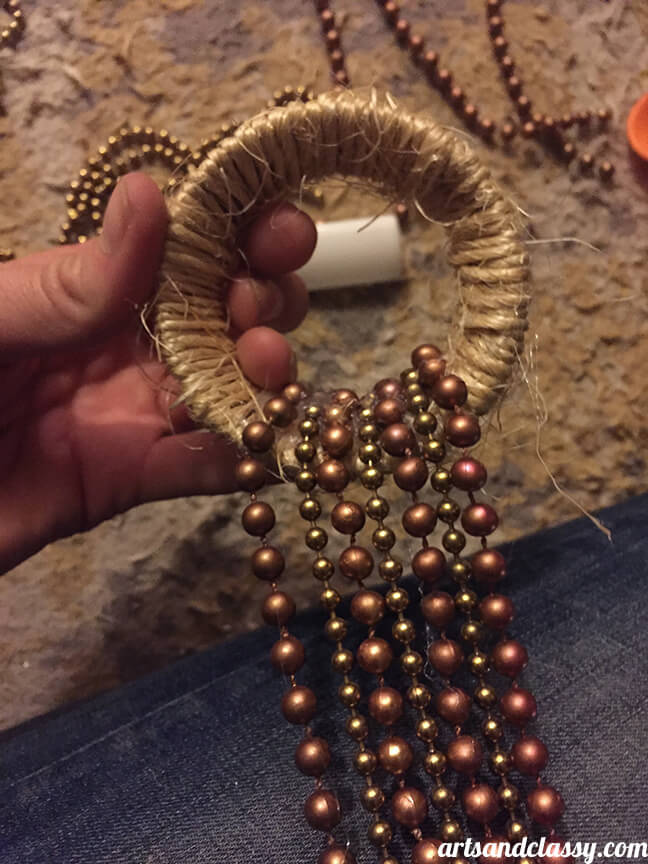
I took my mason jar topper with tacky glue and twine and wrapped up the entire thing. Make sure to let this dry completely before doing anything with it.
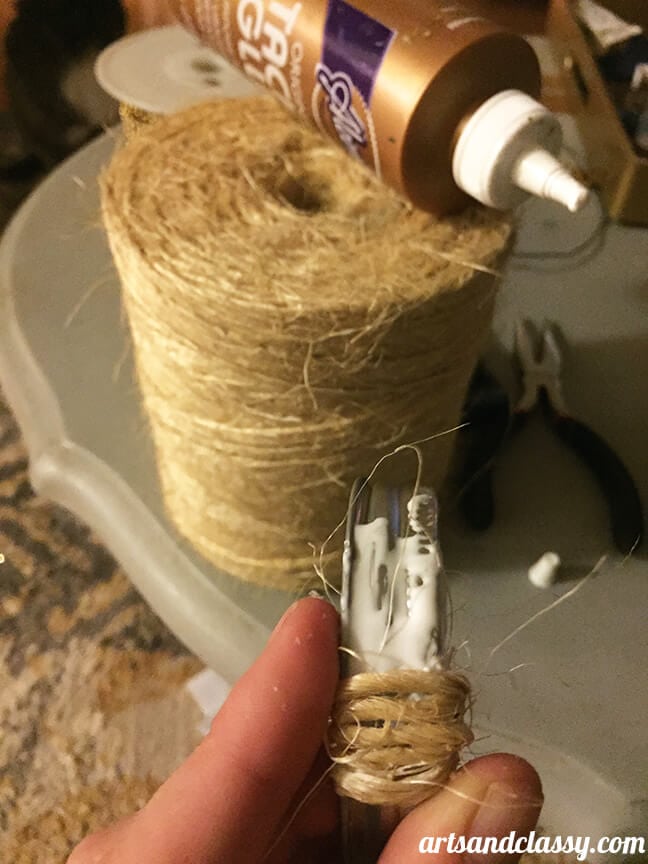
I also had to spray paint my Mardi Gras beads gold before using them. Make sure to get the colors right before beginning this project.
Step 2
I stripped my hangers of their paper.
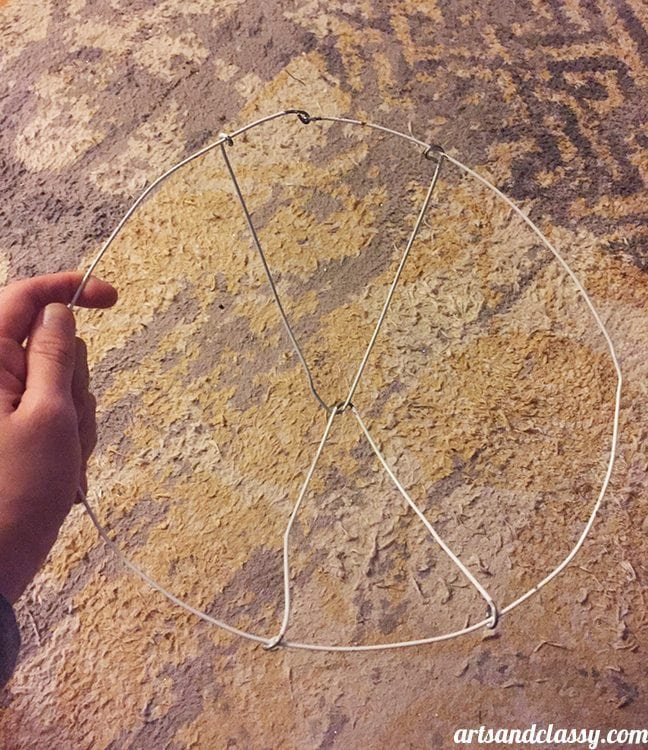
Next, I will cut the top curved hanging part off and will shape 1 circular shape (make sure to secure it in a circle) I bent both ends and connected them to make it one. (needle-nose pliers recommended)
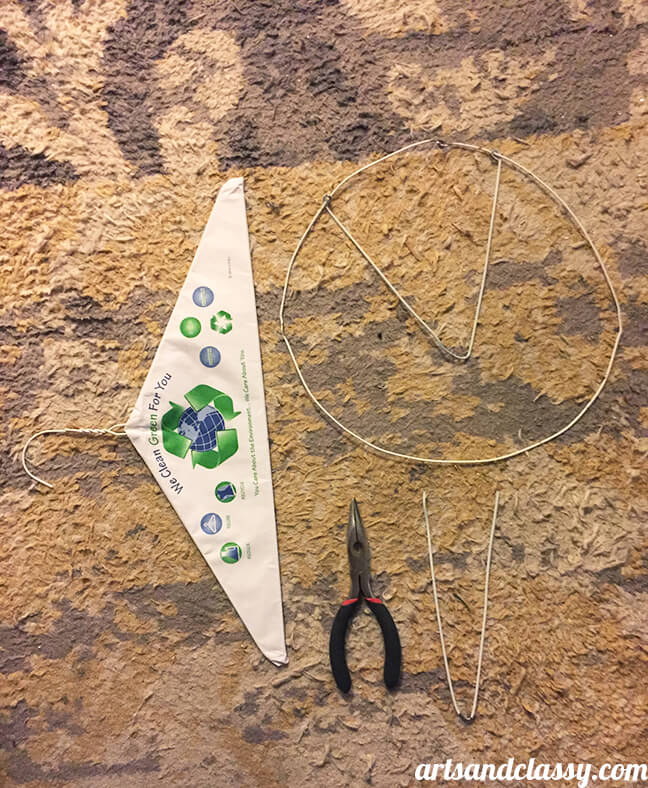
For the next coat hanger I did the same, but instead of shaping it into a circle, folded it in half and cut it. You will now have 2 even smaller wire pieces. I bent these pieces in half and connected the ends to the circular piece while connecting them at the same time.
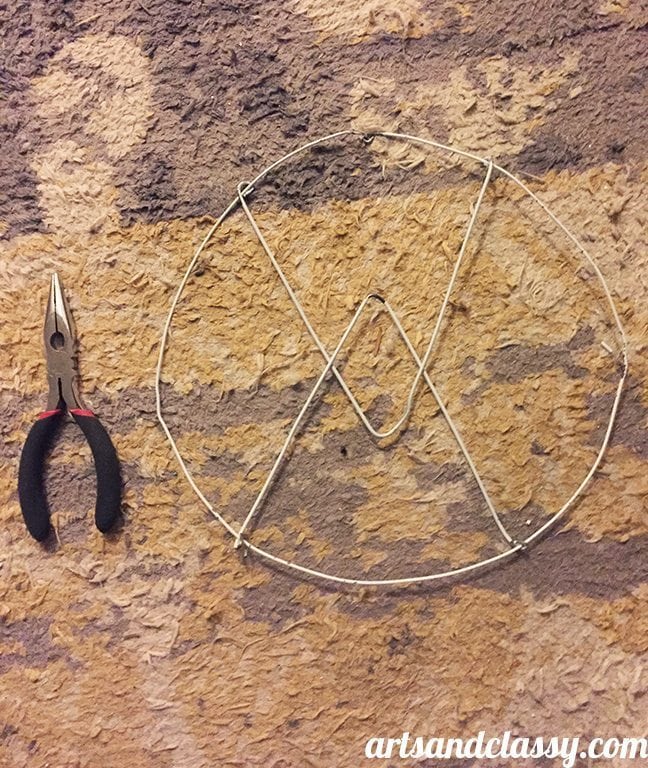
Once the wire pieces are connected you will try to create a dome-like shape to help when you attach your beads.
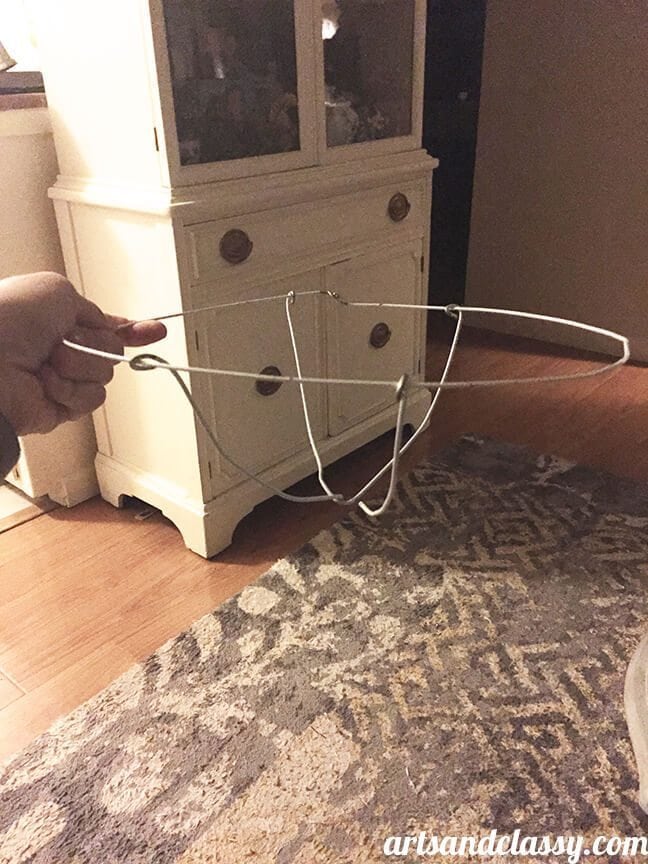
Step 3
I attached the hanging plant chain hanger to the dome piece I created and the twine-wrapped mason jar topper.
Step 4
I took my bead strands and hot glue in the order that I preferred on the interior of the topper.

Step 5
The I connected the lid with hanging beads to the hanging planter connected to the dome shape. I needed to suspend this project while I was working on it.
I used a long piece of molding and supported it between my kitchen counter and a wine rack project I have for the future. (the height was just right it worked splendidly)
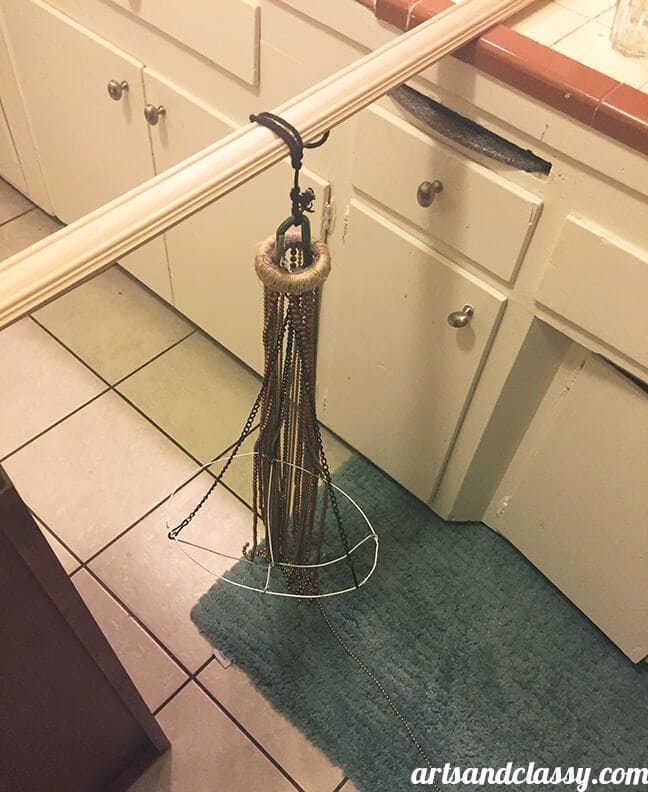
Step 6
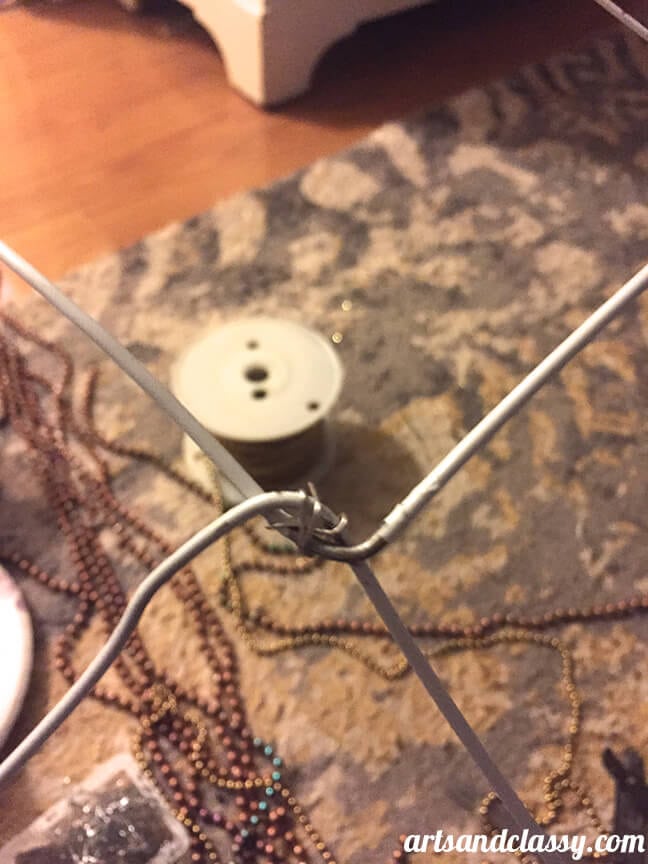
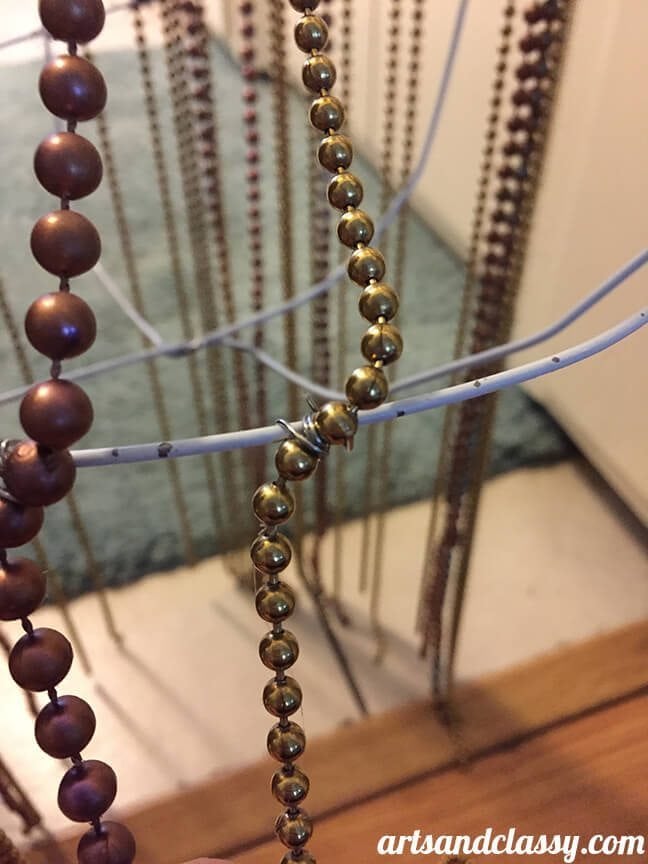
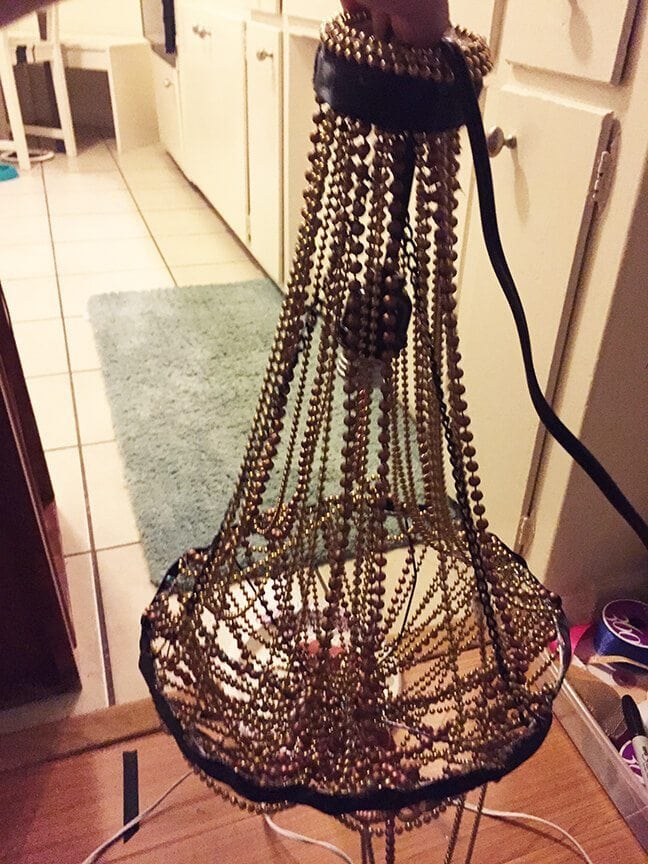
I proceeded to connect the hanging beads to the first tier (aka the larger circle). I secured each strand with a Christmas ornament hanger. My needle-nose pliers were super helpful with this part of the project. I continued doing this around the circumference.
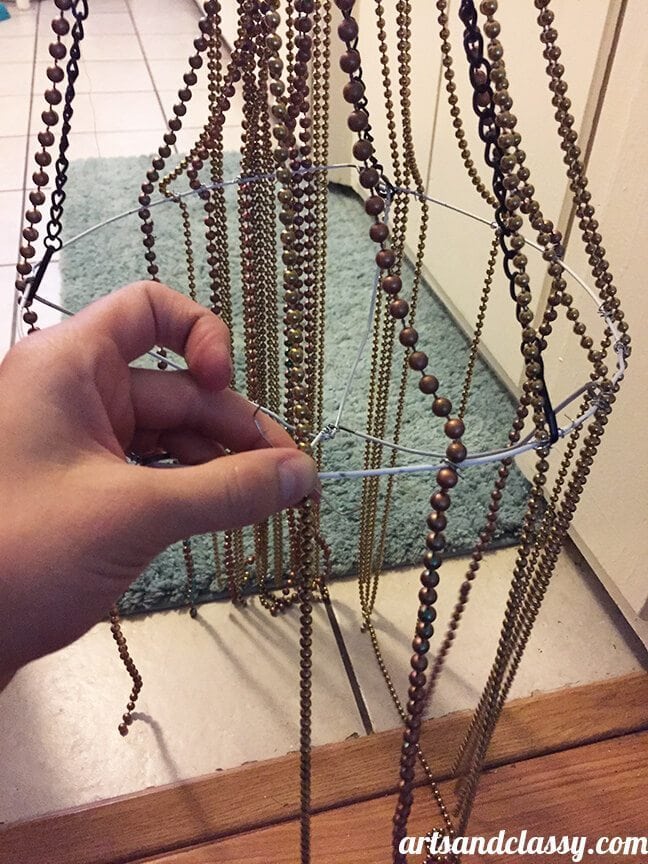
Step 7
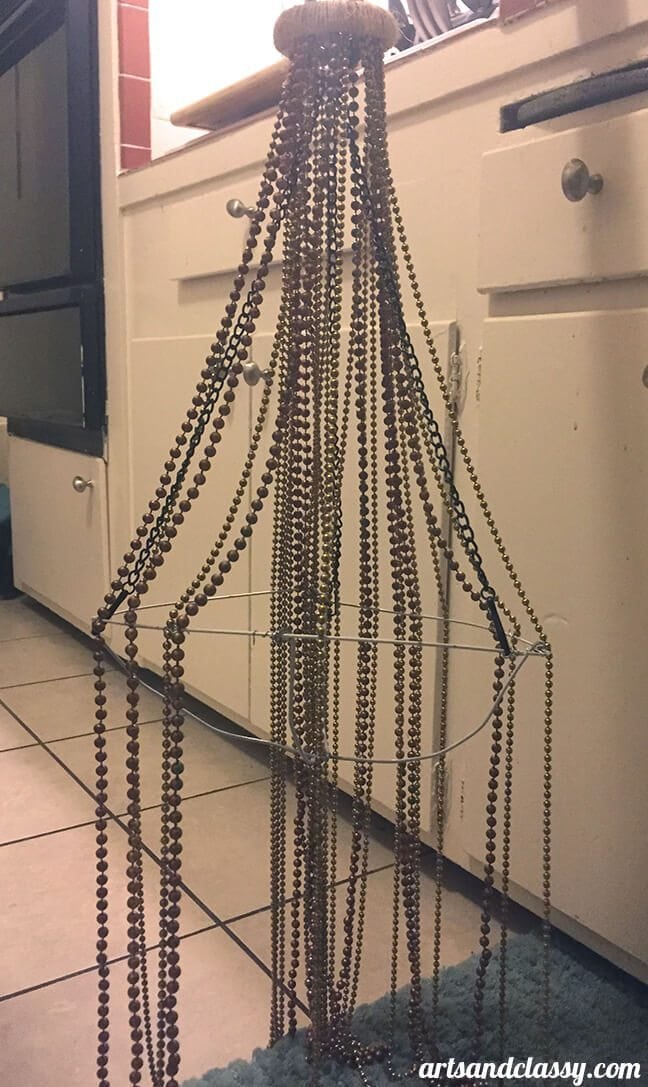
Once I connected all the strands to the top tier, I took the remainder of the strand and swagged it under the coat hanger dome shape. Thus, connecting and securing it to the opposite side of the fixture to achieve a typical waterfall chandelier diy effect. I used more ornament hangers to secure the beads to the fixture.
Step 8
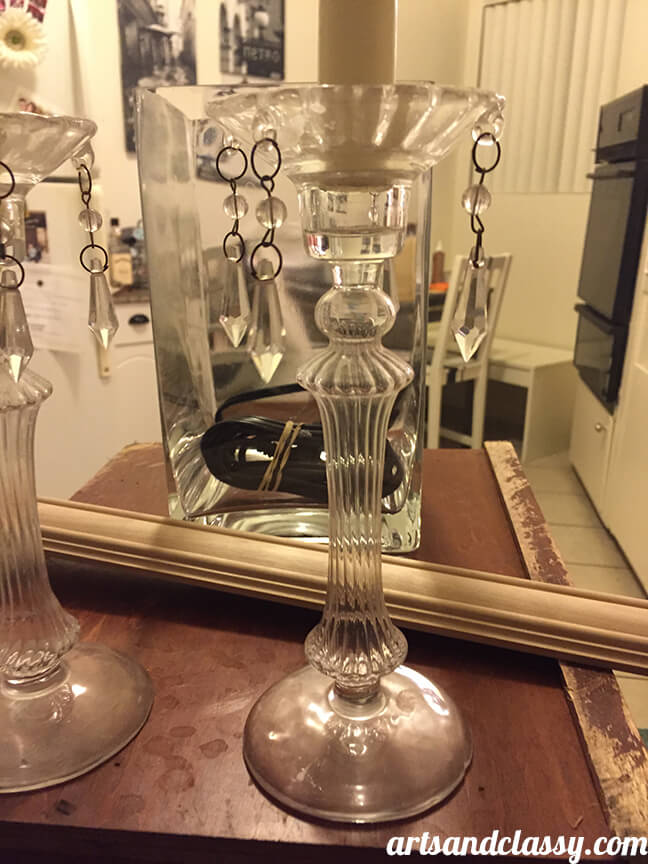
I realized that I had a couple of candle sticks that were given to me by a friend who had these lovely little hanging glass decorative pieces. I decided to remove them from the candle sticks, spray-paint them black, and attach them to the sides of the chandelier.
Step 9
I added a swagged bunting effect with beads on the sides of the chandelier.
Step 10
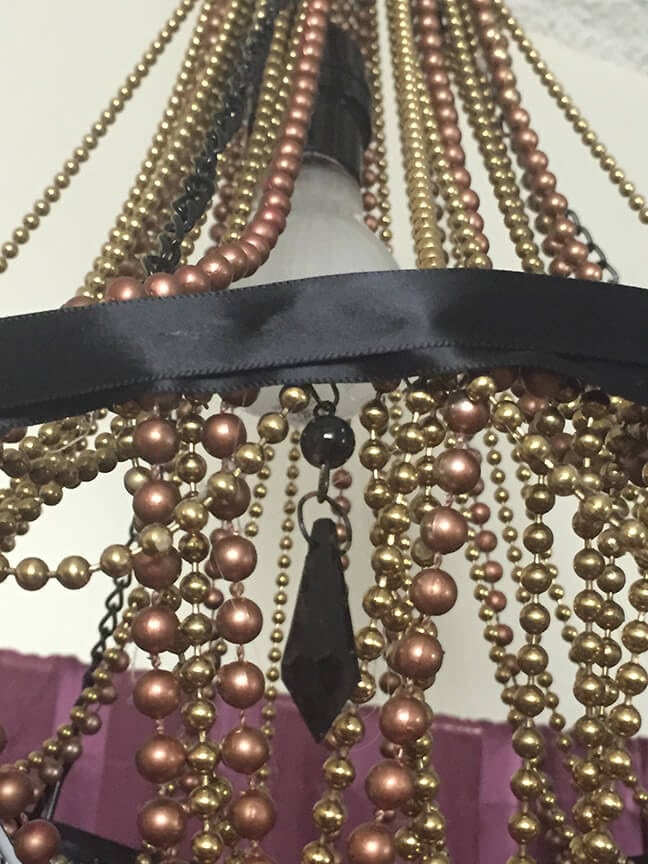
I decided to wrap the top and the middle of the fixture with a pretty black ribbon to finish it off and mask off the coat and ornament hanger’s unfinished look.

Step 11
I inserted the wire and socket through the top of the mason jar topper and added a leftover piece from the wire hanger into the underside of the topper.
Why you ask?
A) to secure the wire in place.
B) To add additional support when hanging the waterfall chandelier DIY from my ceiling.
Step 12
Once secure, I installed my lamp swag kit hooks from the ceiling. I hung my lamp at my desired height and used a decorative ribbon to add a little extra elegance to cover the black electrical wire.
Step 13
I plugged it in and had a cocktail to celebrate my creation!
I hope you enjoyed this tutorial and found it helpful for your DIY-ing future!
I am so in love with this waterfall chandelier diy project! I can’t stop looking at it. I have so much pride because I made it and it is exactly what I wanted in my room to achieve the vintage glam feel.
If you liked this project, you might also like:


This is amazing!! So creative! I love it!
Thank you so much Rebecca! I appreciate the feedback and I am very proud of this chandelier. Happy to hear it is being well received!
Oh My Gosh! This is such a wonderful idea and what a great tutorial you have put together. I love that it doesn’t cost anything – you had all the supplies needed. It looks lovely.
Thank you so much for your feedback!! I feel so lucky to have all the supplies I need for most projects. BTW your kitty Lily is beautiful. I have 3 of my own. Aren’t cats the best?
very creative! I think I would use an Edison bulb for really cool effect.
Wow! That turned out amazing! I love projects that make something spectacular out of ordinary, every day things.
How creative you are Meredith! I have also been desiring a chandelier for my bedroom but didn’t want to spend the $. Now I know how to make one! Thank you so much for your tutorial.
Kim! I am so happy I could assist you with achieving your desired look for your bedroom. I hope you have fun while you are making it! Please feel free to share with me too when you are finished with it. I would love to see.