DIY Makeup Storage Organization [Renter-Friendly]
Are you a renter looking for an inventive, creative way to store your makeup tools collection? Well, look no further! This DIY Makeup Storage Board Organization is the perfect way to get organized especially if you have a lot of makeup.
With just a few simple materials and effort – you’ll have everything in its rightful place in no time.
Not only that but this organization’s idea can be easily moved from one home to another without having to leave any permanent damage or holes. Imagine being able to quickly find exactly what you need with easy access — say goodbye to searching through cluttered drawers and cabinets forever! Leave behind the idea of never being able to reach all corners of your drawer space as you now have limitless possibilities along with full visibility on all of your products!
Get excited about keeping all your beauty goodies organized and tidied up – it’s time for a transformation!
After completing my bathroom makeover back in March of 2018, one of the top questions I kept getting was “How did you make your DIY makeup board“? I decided to take action and share how I made it.
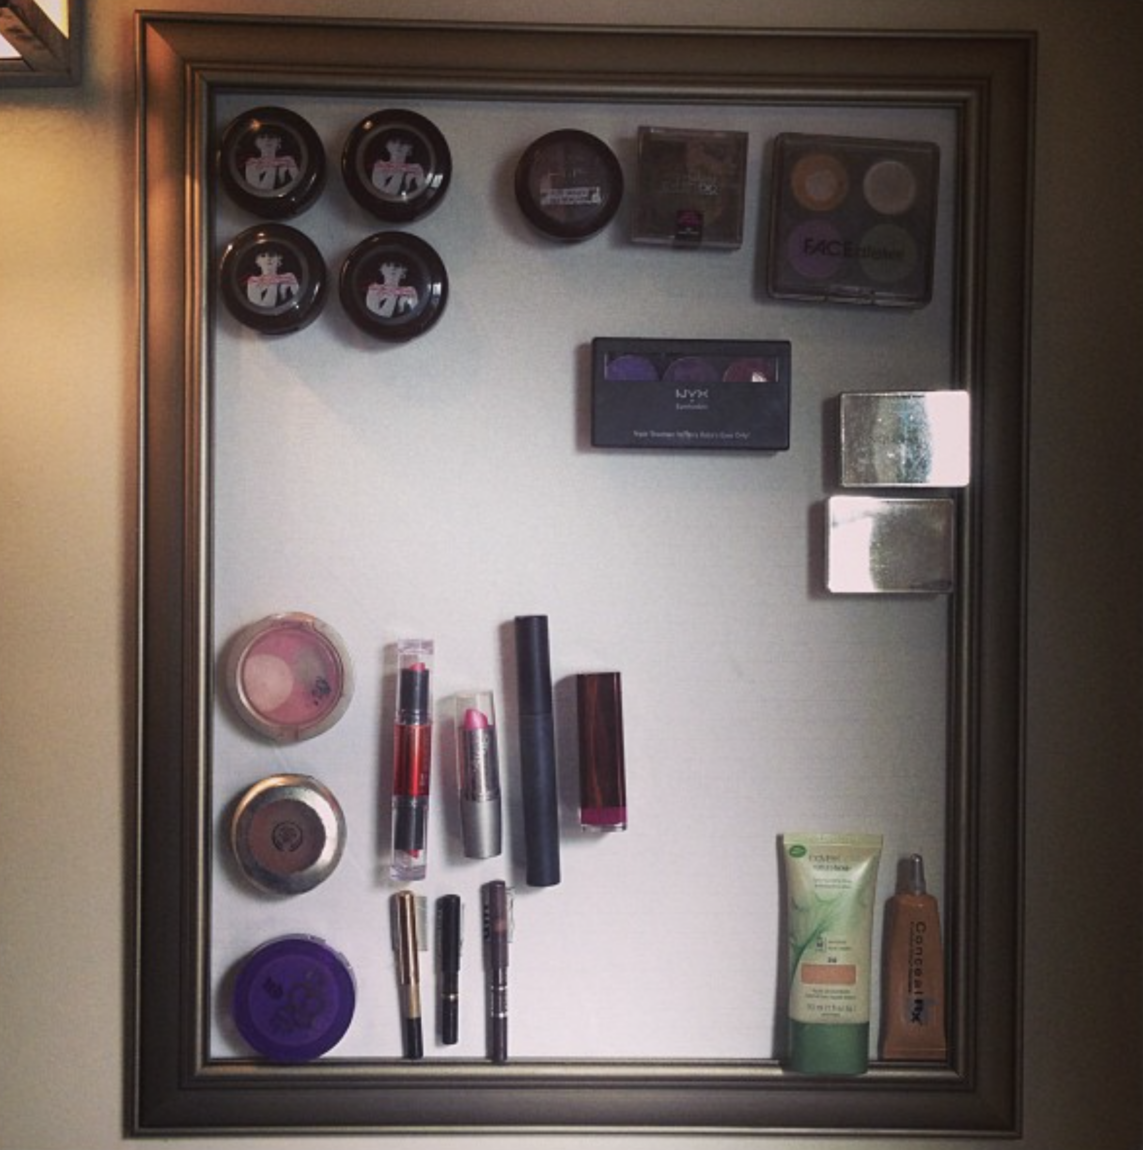
I made this magnetic makeup board back in 2013 and it was definitely in need of a makeover.
*There are affiliate links within this post. If you purchase through my link I may earn a small commission. Thank you for your support.
Check out all the supplies used for this project:
- 16”x20” Frame (I did not use this specific frame as I already had one around my house but this one looks similar)
- Fabric (Similar to the fabric I used)
- Spray Adhesive
- Scissors
- Hot Glue Gun (Similar to my hot glue gun)
- Spray Paint
- Galvanized Sheet Metal
- Magnets
STEP 1: Take a picture frame and spray paint it if necessary to the color of your choice
Giving your picture frame a makeover can be an exciting and rewarding task. Spray paint the frame in any color of your choice. I chose black when I redid my DIY makeup storage and organizer. If you don’t want to use spray paint for this step, you can use normal paint and or fun things like washi tape.
STEP 2: Head to your local home improvement store or Amazon to get a sheet of galvanized sheet metal
Galvanized metal can usually be found in the plumbing section but is perfect for pairing with magnets and also it’s easy to cut down to the size you choose for your DIY makeup organizer.
STEP 3: Cut the galvanized sheet metal to size
I used scissors for this step, but pliers can also work to cut down this flexible metal. This makeup holder is so easy to create.
STEP 4: Use spray adhesive and fabric of your choice to cover the metal sheet.
Adding a bit of DIY charm to your organization is never a bad choice – and nobody said it had to be complicated! With just some spray adhesive, a fabric of your choosing, and an old metal sheet you can craft a uniquely stylish solution to tidying up your makeup storage. You’ll end up with something lovingly crafted that looks chic and helps keep you organized. It’s the perfect marriage of customization and convenience!
STEP 5: Pop the fabric-covered metal sheet into the frame to finish this magnetic board.
I love an easy DIY project. Also, the fact that this is a pretty mess-free project. Love that!
STEP 6: Hot glue strong magnets to the back of makeup products, makeup brushes, and accessories you want to store.
You can easily place your lipstick and eyeshadow on the frame for a fun DIY makeup display without having to take up more space on your countertops.
With this creative solution, you’ll save space, and money and have a unique idea all to yourself that will neatly store all of your cosmetics. Who needs an expensive acrylic organizer when you can make it yourself? Get started today with your DIY project and be amazed at the results!
What did you think of this DIY makeup storage board project?
Plus, dare I say this project could make an awesome DIY gift idea for a friend or family member that you know could need it.
If DIY makeup storage ideas aren’t your style, here are some of the best makeup storage ideas all under $50.
If you wouldn’t mind either leaving a comment here or under the video on YouTube, I would love to hear what you thought of this project. If you didn’t get a chance to see my bathroom makeover from my last home, make sure you check it out.

