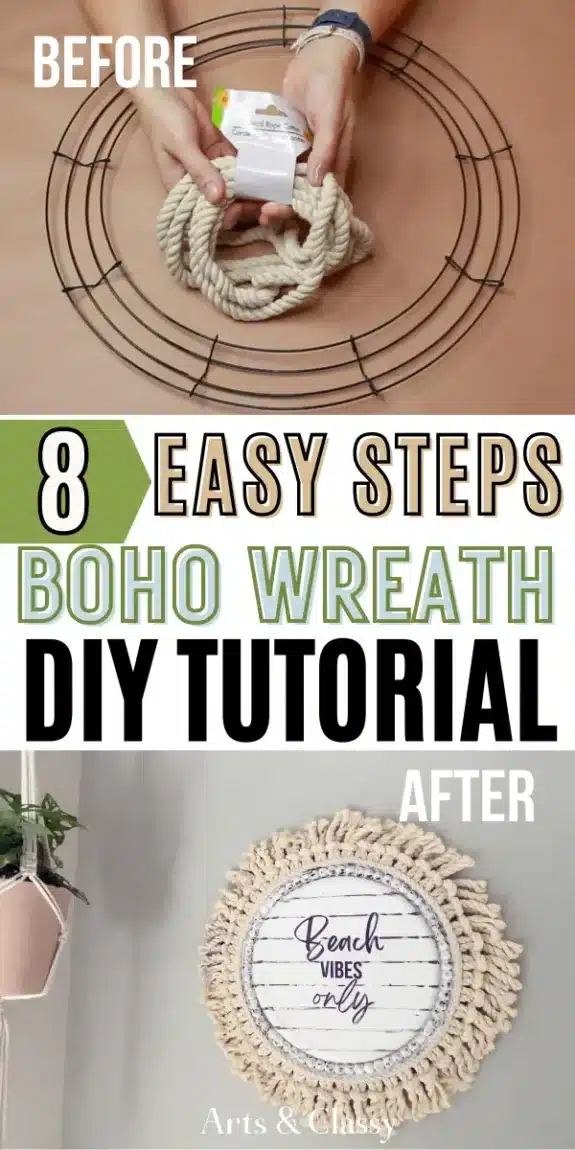
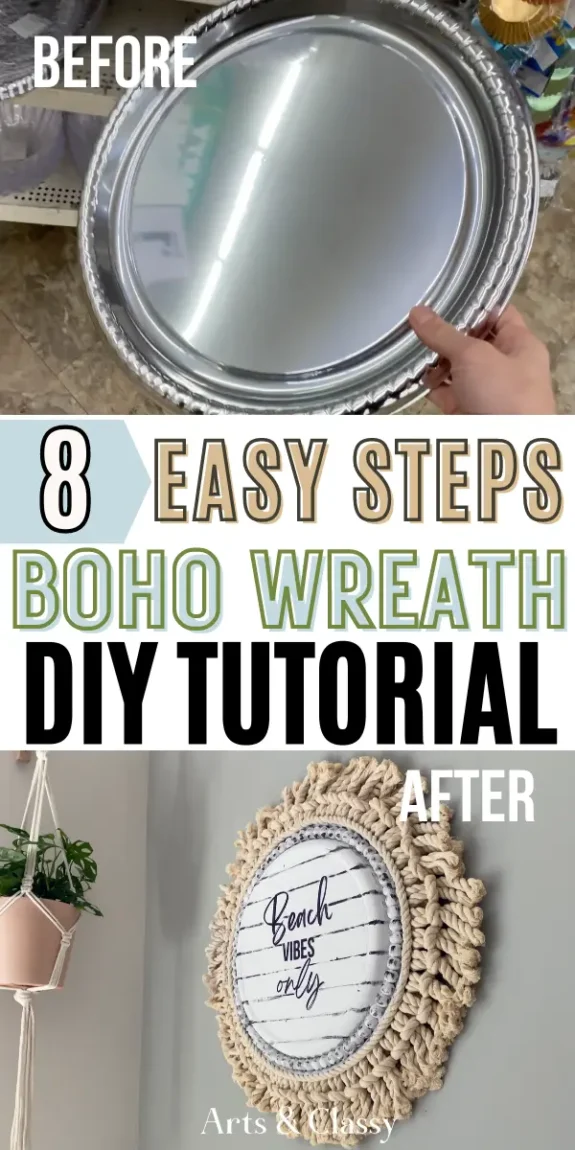
Boho Wreath DIY: Make a Stunning Nautical Rope Wreath with a Free Beach Printable
Hey there, fellow DIY enthusiasts! Today, I am beyond excited to share one of my latest craft obsessions: a boho wreath DIY that screams beach vibes. Imagine the perfect blend of boho chic and nautical charm, all wrapped up in a stunning rope wreath.
And the best part? I’m adding a fabulous free “Beach Vibes Only” printable to take it to the next level.
Ready to bring a bit of the beach into your home? Let’s dive into this tutorial!
First I have to give credit where credit is due. This project was inspired by Twin Birdies project that was done with a Dollar Tree pizza pan. If coastal farmhouse is your home decor style and you are on a budget, you are in the right place.
This post contains some affiliate links. I may earn a small commission if you purchase through one of these links. See more information in my full disclosure policy.
Materials Needed
Before we start this boho wreath DIY adventure, let’s gather all the goodies we need. For this project, I hit up my favorite spot—Dollar Tree—for some budget-friendly finds.
Here’s what you’ll need. You can shop almost everything on my Amazon Storefront:
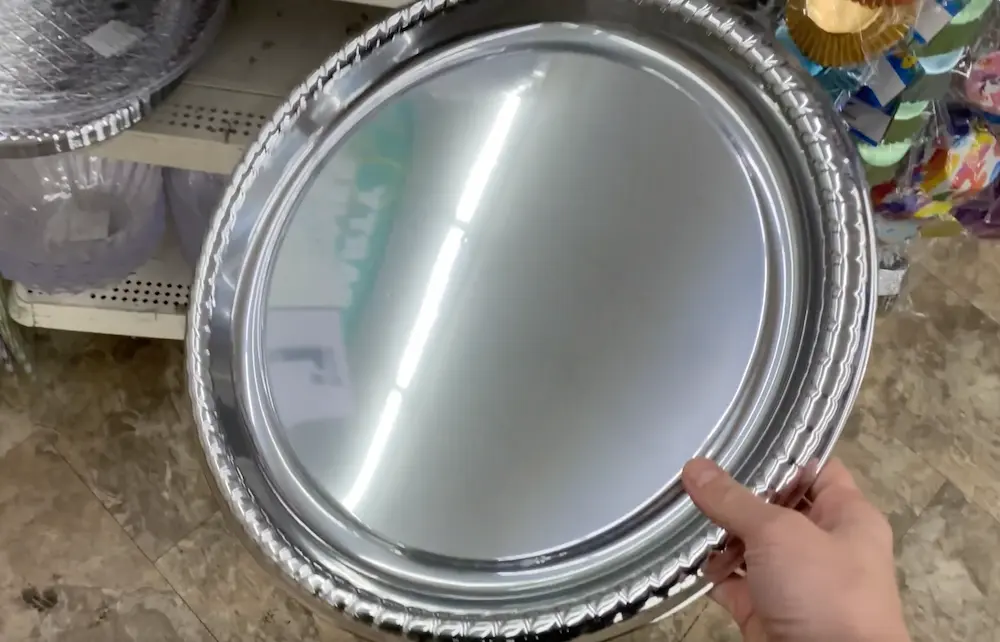
- Dollar Tree’s 16 in. round tray plastic platter
- 18 in. Wire wreath frame
- Nautical rope (also from Dollar Tree)
- Mod Podge
- Sponge brush
- Black acrylic paint
- Ruler
- Artist brush
- Paint brush
- Rustoleum White chalk paint
- Hot glue gun
- Hot glue sticks
- Wood Beads
- Scissors
- Free “Beach Vibes Only” printable (you can download it via the form below)
- Paper (for the printable)
- Additional embellishments (optional: think shells, faux greenery, ribbons, etc.)
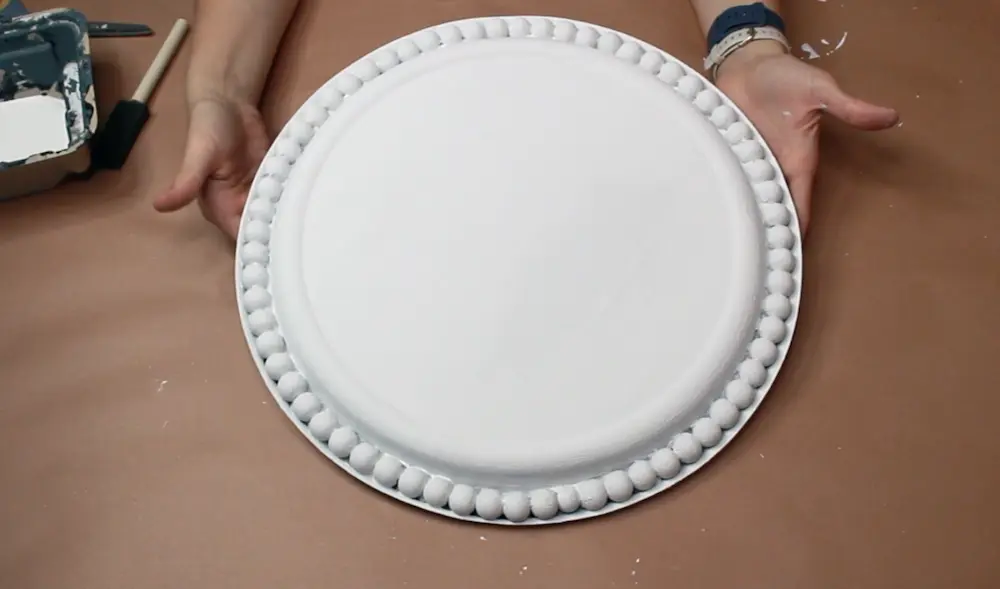
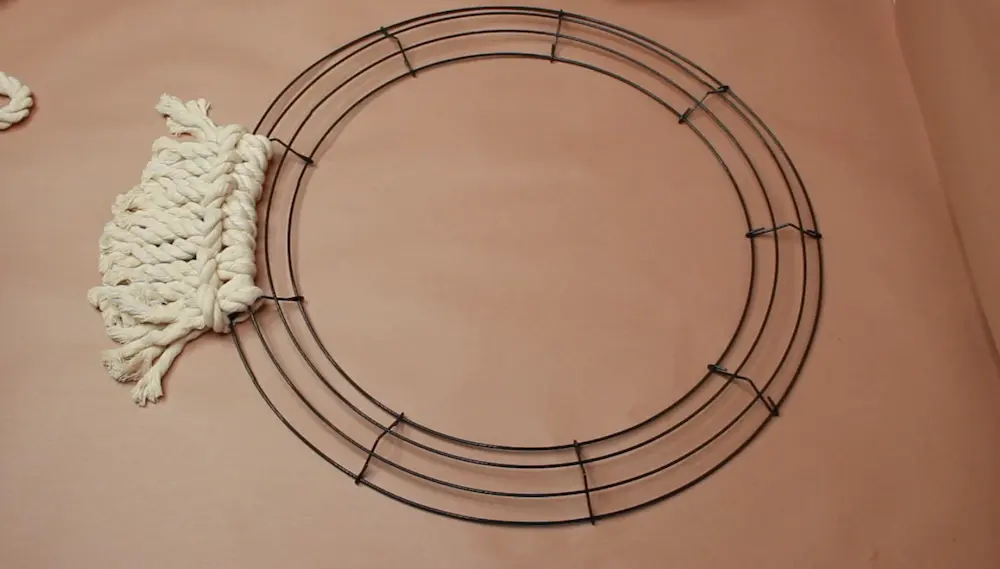
1. Preparing The Wreath Base
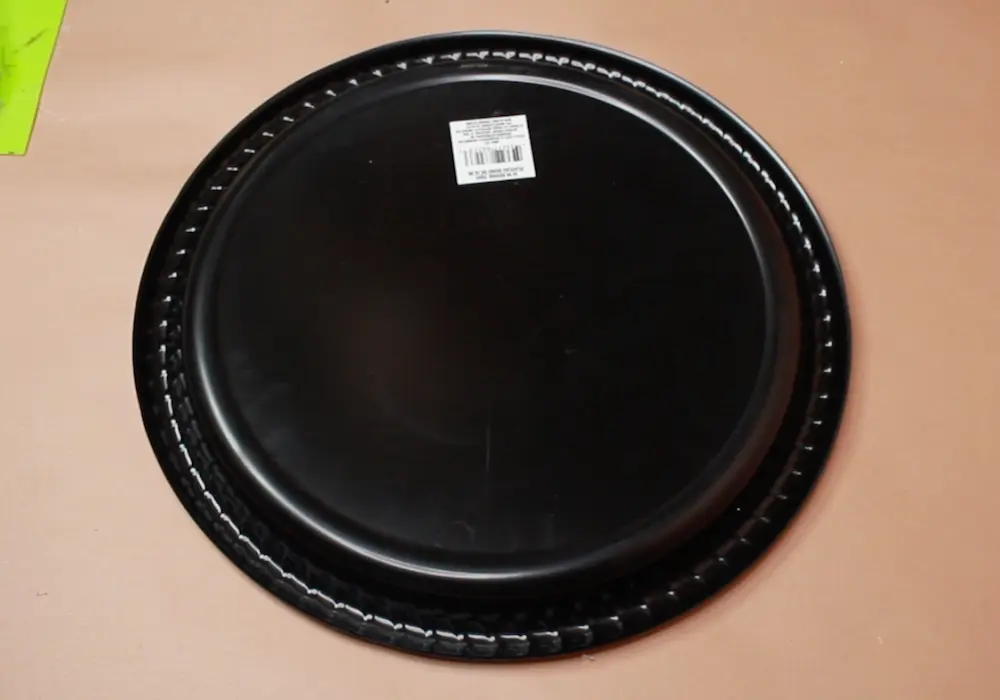
First things first, we need to create the base of our wreath. Grab your Dollar Tree plastic platter and nautical rope. This platter is about to get a serious makeover!
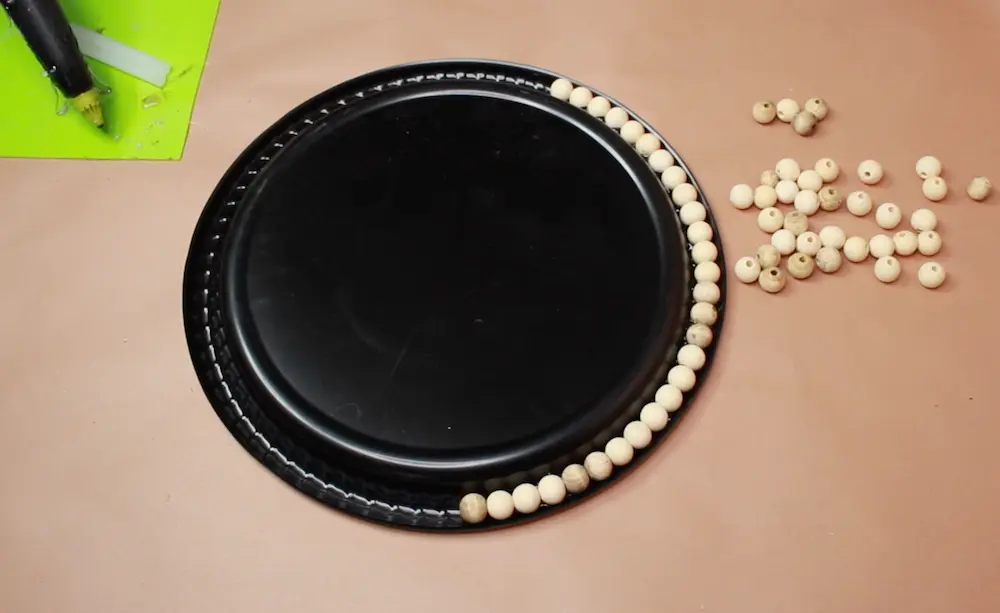
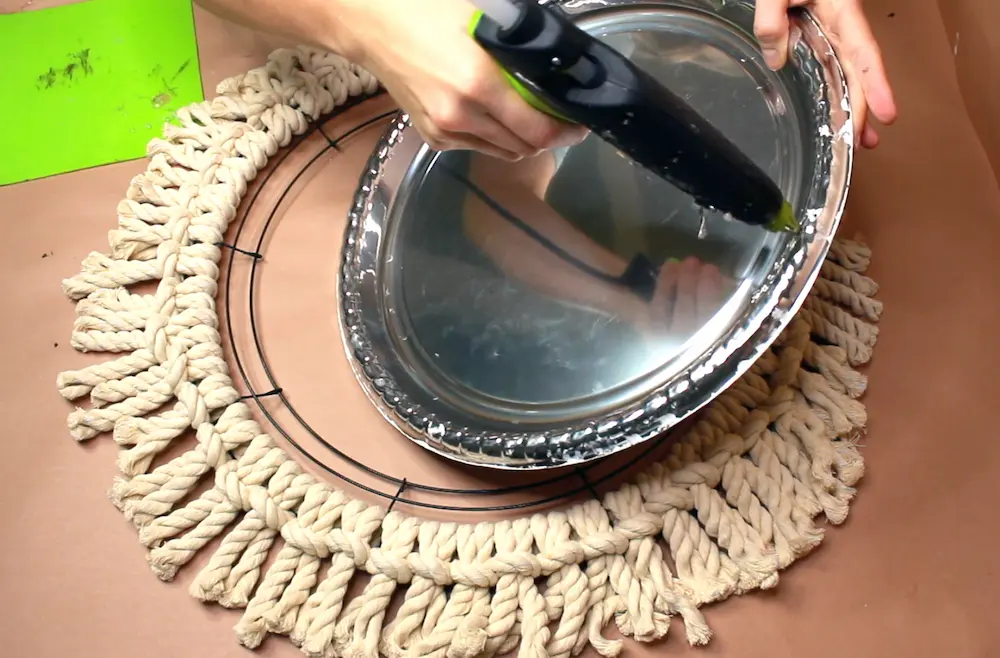
2. Glue Wood Beads on the Back of the Tray Circumference
Use a hot glue gun with Gorilla glue sticks to secure the wood beads in the dip around the edge of the circumference of the tray.
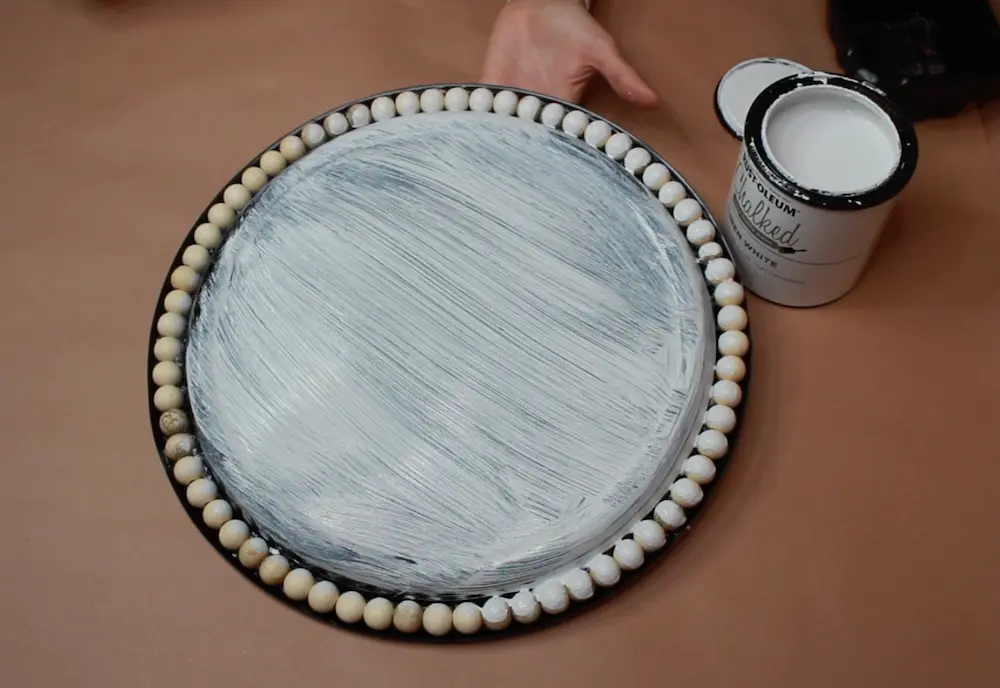
3. Paint the Back of the Tray White
Rustoleum’s “Linen White” chalk paint is a staple in my DIY cabinet. I use this paint for so many projects. It’s affordable, it’s durable, and I just love it! Highly recommend.
I applied this paint all over the beads, and the back of the tray allowing plenty of dry time in between layers. I believe I used about 2-3 layers of paint to get the coverage I was looking for.
RELATED: How to Make a Nautical Mason Jar Lamp in 7 Easy Steps
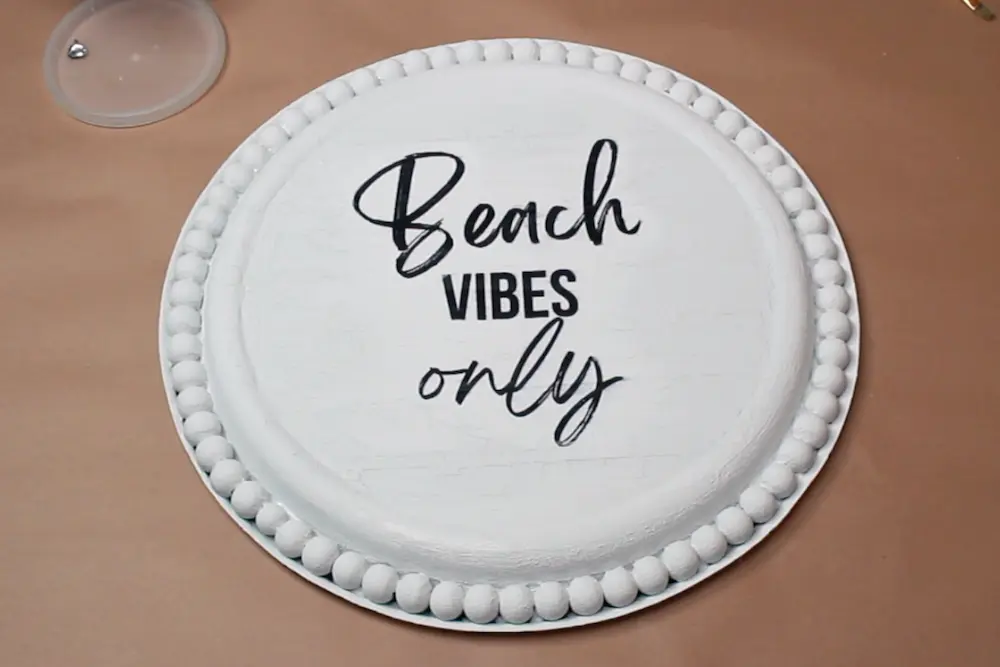
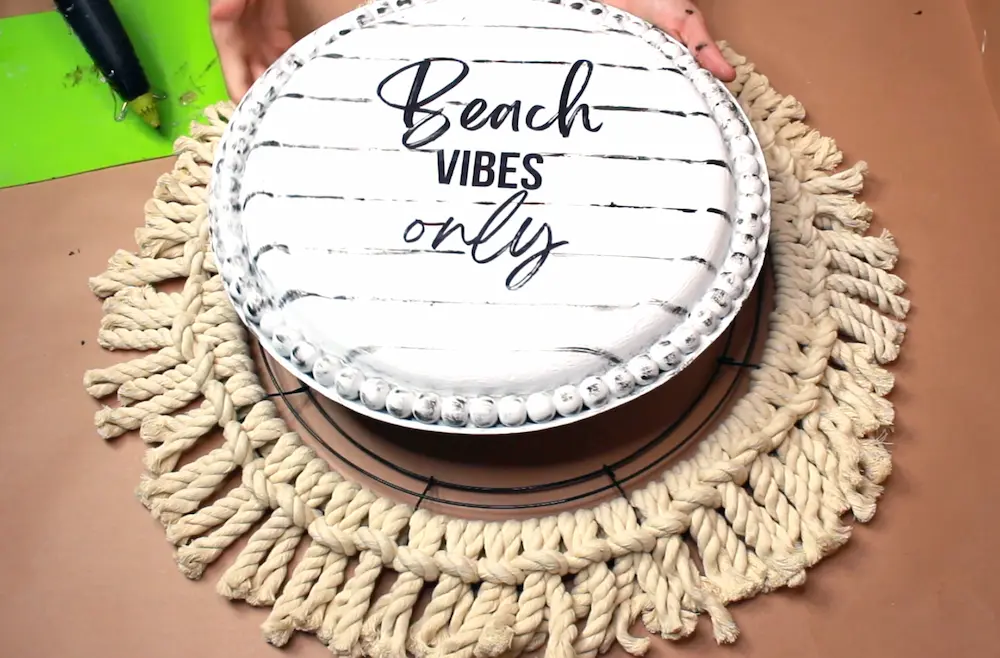
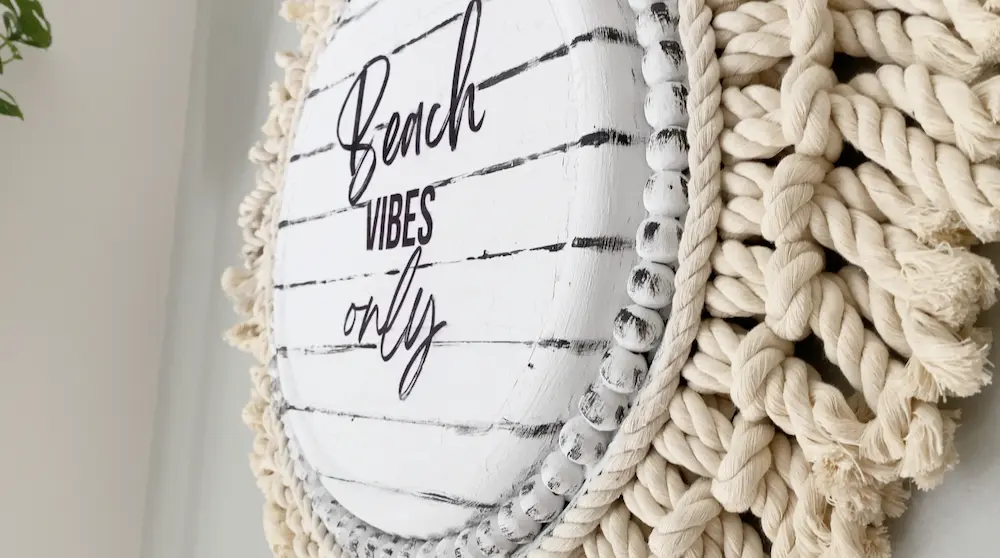
4. Attaching The Beach Printable
Now, let’s get that beach vibe going with our “Beach Vibes Only” printable. This is where the magic happens!
Print your “Beach Vibes Only” sign on cardstock paper. Once printed, carefully cut it out, leaving a small border if you prefer a framed look.
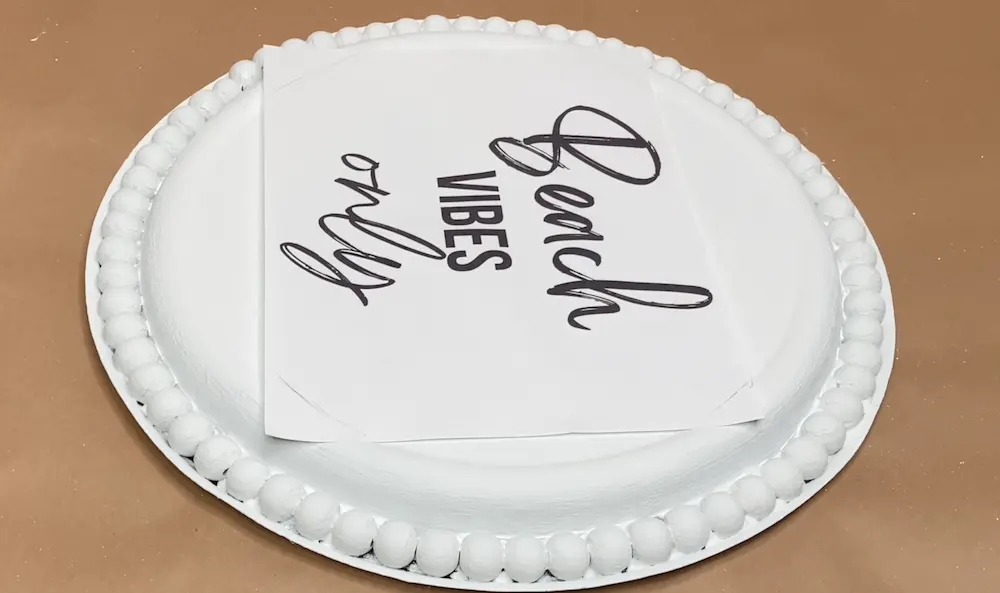
Position the printable in the center of your wreath. Use hot glue to attach it to the plastic platter. Make sure it’s centered and straight. You might want to use a ruler or eyeball it—whichever you’re more comfortable with.
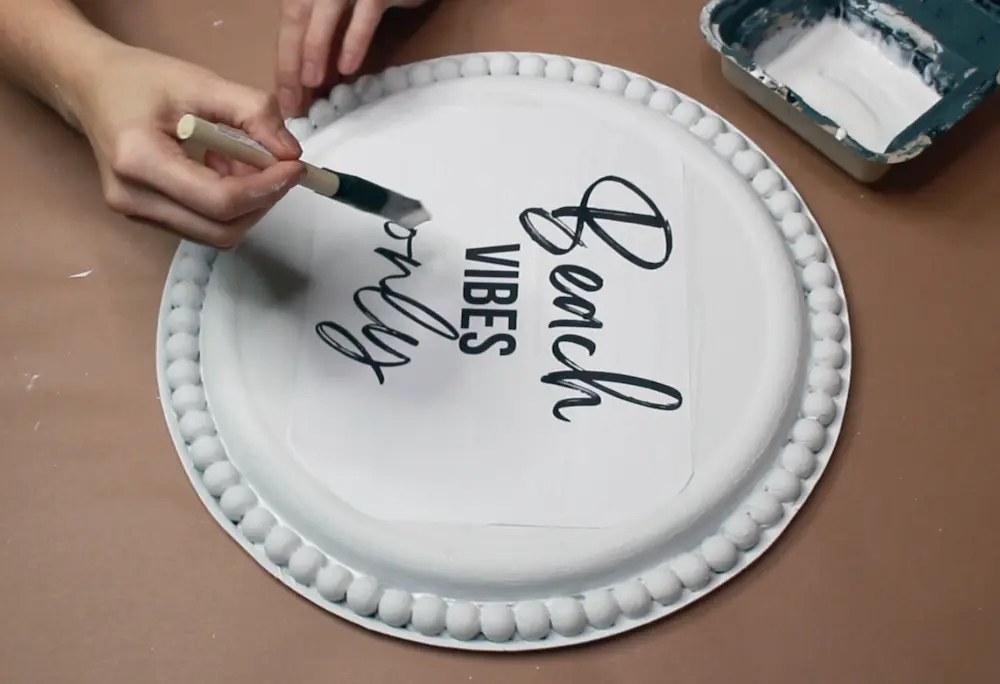
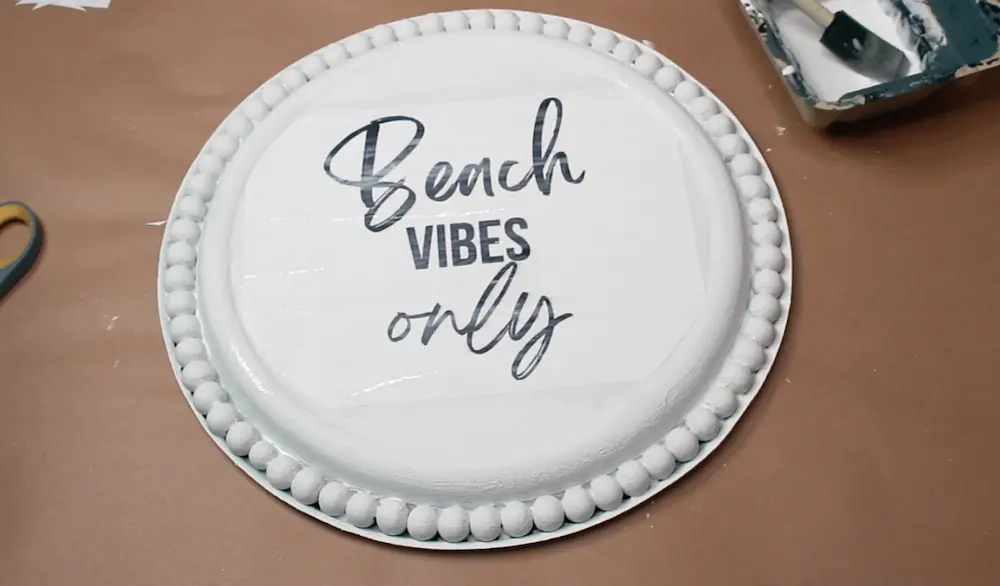
5. Go Over Printable With White Paint
I made this project for anyone without a Cricut maker. I do but for a long time I had to make it work with other methods and I love that this printable is easily disguised by adding more of my white chalk paint to the paper. It becomes more seamless and looks more like I used a Cricut to make it.
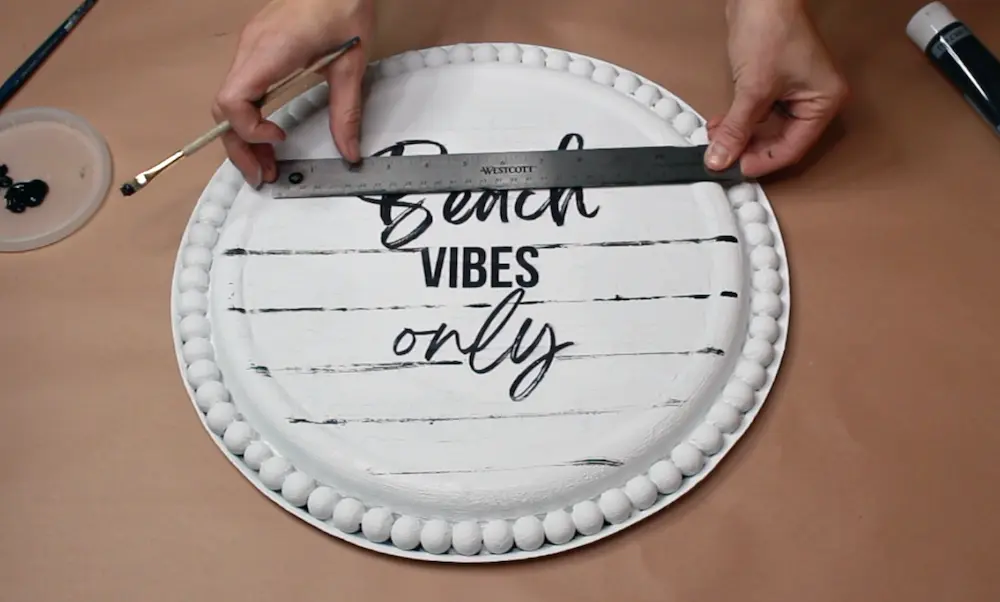
6. Apply Distressed Black Plank Stripes
This is one of the small details that I think makes a big impact on this DIY project! I loved adding the distressed wide strips of faux wood planking. It adds a whole new level of depth to this coastal boho wreath DIY!
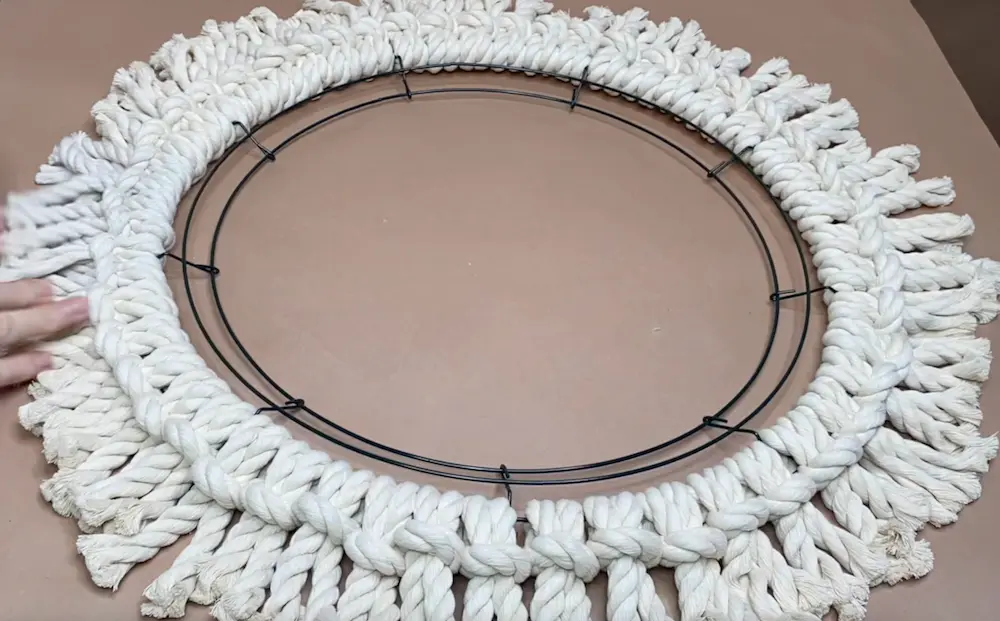
7. Wrap the Rope On a Wire Wreath Frame
Start by gluing one end of the nautical rope to the edge of the platter. Secure it with a generous dollop of hot glue. Once it’s set, wrap the rope tightly around the edge of the platter. Keep it snug and close, the vertical pieces of the the wreath frame keep these secured and evenly spaced.
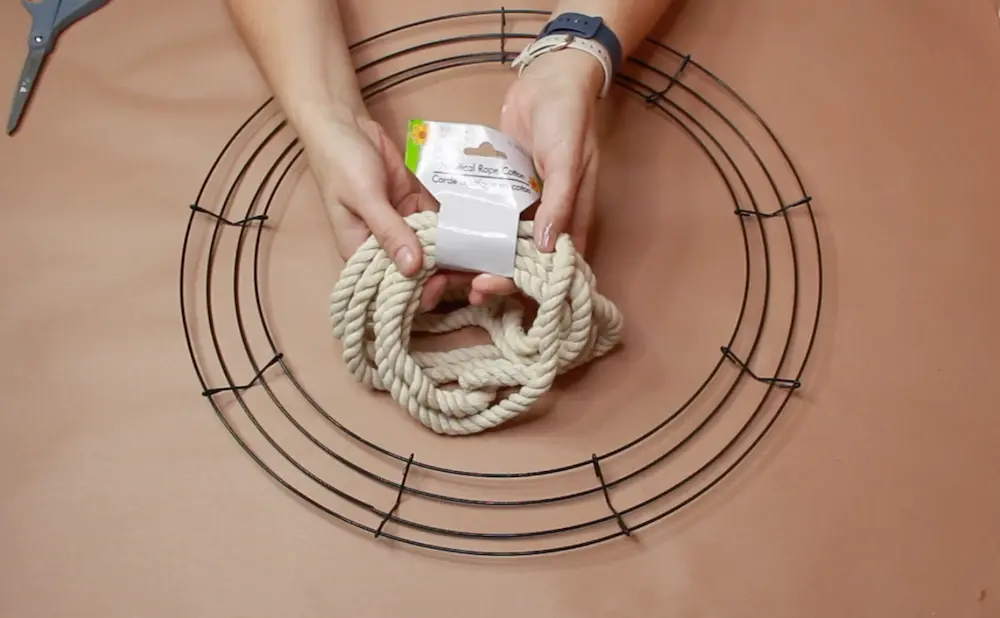
Continue to cut and knot until the entire edge of the platter is covered. This creates a beautiful, textured base that looks like it came straight out of a coastal boutique.
Voila! Your wreath base is ready.
RELATED: How to Craft Your Dream Boho Mirror On The Cheap – Fast & Easy!
8. Attach The Wreath Frame To The Tray
I used hot glue to attach the tray to the wire wreath frame.

RELATED: Where Can You Find a Bargain on Boho Throw Pillows?
Adding Any Additional Embellishments (Optional)
Now comes the fun part—embellishments! This is where you can really let your creativity shine.
Shells and Greenery: Add some seashells around the edge of the rope for a more authentic beach look. Glue them in place with your hot glue gun. Faux greenery can also add a nice touch. Think sprays of small sprigs of eucalyptus, florals, or ferns.
Ribbons and More: A bit of ribbon can add a lovely finishing touch. You can tie a bow at the top or bottom of the wreath or weave it around the rope. It’s all about what makes your heart happy!
Tips And Tricks For A Successful Wreath
Creating this boho wreath DIY is pretty straightforward, but here are a few tips to ensure it turns out perfect:
- Patience: Allow each step to dry/cool and set before moving on. This ensures everything stays in place.
- Even Wrapping and Lots of Nautical Rope: Keep your rope wraps even and tight. This gives a more polished look.
- Printable Perfection: Print your sign on high-quality cardstock for a more professional finish.
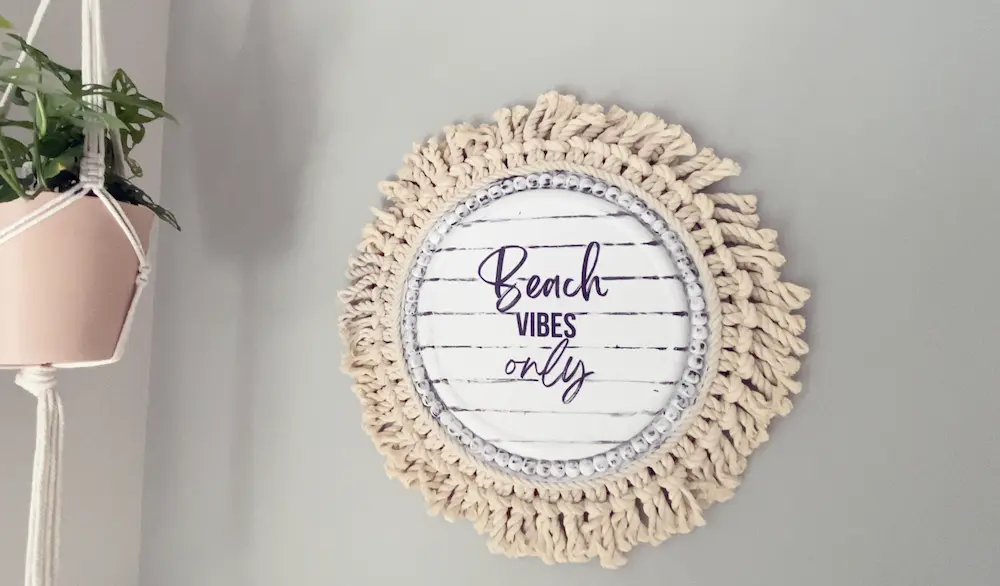
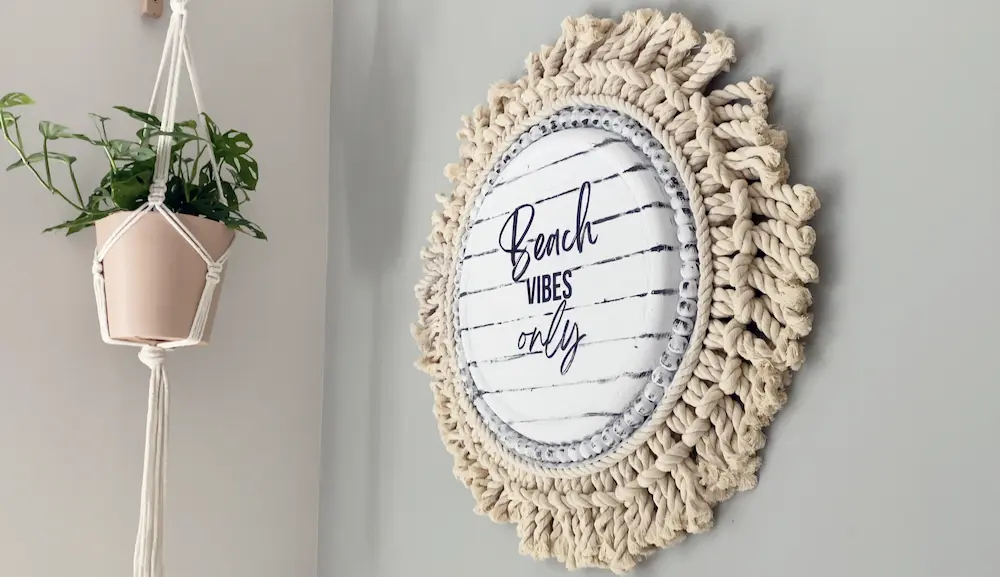
Ideas For Displaying The Finished Wreath
Your stunning boho wreath DIY is complete—now, where to show it off? Here are a few ideas:
- Front Door: Welcome guests with a burst of beachy goodness right at your front door.
- Living Room: Hang it above your mantle or on a focal wall to bring some coastal charm indoors.
- Bedroom: Create a serene, beachy vibe in your bedroom by displaying it above your bed.
- Master Bathroom: This wreath new lives in my coastal Farmhouse master bathroom and I am still obsessed with it!
That’s it, folks! Your boho wreath DIY is ready to bring those sunny beach vibes into your home. Don’t forget to share your creations with me—I’d love to see how yours turned out. TAG ME on social media!
Make sure you are following me on Instagram, Facebook, Pinterest, YouTube, Hometalk, and TikTok for more ideas on how to decorate your home!
Happy crafting, and may your days always be filled with boho charm and beachy bliss!


One Comment
Comments are closed.