DIY Baseball Side Table For a Little Boy’s Baseball Bedroom
Hi readers, I’m so excited about this baseball side table makeover! Welcome my guest blogger Stephanie from One Mile Home Style for Make-Over Monday! She loves finding great deals and transforming them into unique and valuable for her home. Please stop by her blog and check out her fun projects!
Hi there Arts & Classy Readers! I am so excited to stop by today and share one of my recent baseball theme furniture updates with you all.
A DIY Baseball Side Table
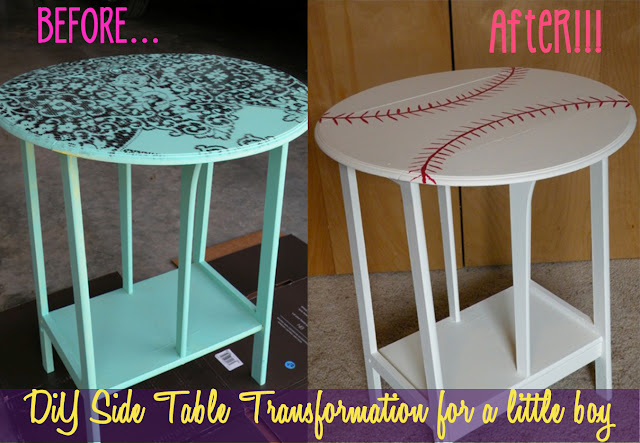
We ended up with this little side table that really didn’t fit with any of the colors or styles of our home because my youngest son insisted that we needed it. I think it had something to do with the fact that it is light enough for him to pick up by himself, and the sides of the table can fold up and down. Here she is pre-makeover.
After a quick discussion, we decided this table would look perfect as a baseball.
Luckily, I had a quart of ivory paint just waiting to be used for something. (It was a freebie from a couple of months ago when our local Westlake Ace Hardware store was doing free paint on Saturdays. Score!) The table already looked brand new after a couple of coats of paint.
This post contains some affiliate links for your convenience. Click here to read my full disclosure policy.
Supplies needed for this baseball side table makeover:
- ivory white paint – this paint is a good option, so is this paint
- one large oval-shaped bowl
- a pencil
- red acrylic paint
- a paintbrush – fine tip is best
- a baseball, for reference
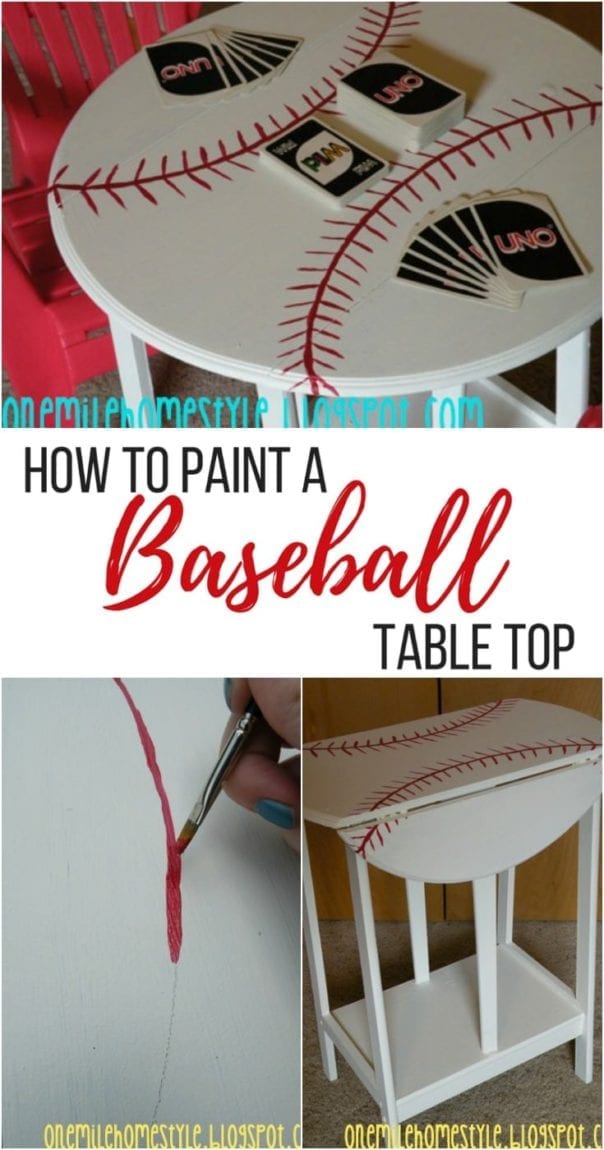
Tutorial: How to paint a baseball side tabletop
**It was helpful to have a baseball as a reference, just to make sure I had the “threads” going in the right direction. After deciding which way I wanted the seams to run, I laid my bowl on one side of the table and traced the edge lightly with a pencil. Then I laid the bowl on the opposite side, making sure that it looked mostly even, and traced my line for the other side.
Then I got out my red paint and painted over my pencil lines. My lines are not all perfectly even, but that just adds to the character. It’s no fun to make things by hand if you are constantly worried that whatever it is, is not perfect.
I went back over my lines one more time, just to have little darker coverage, then it was on to the threaded part of the seams. This is where having a baseball comes in handy. The threads are ever so slightly angled and go in opposite directions on either side.
Don’t Forget to Seal
Ideally, I would have sprayed a clear sealer on this as soon as I was finished. However, the humidity was about 70% (it felt like more than that) when I was doing this and the can said “do not use it in high humidity” so I will get it sprayed another time. Here is our awesome baseball table post-makeover:
This was a super easy and free update to take this table from ok, to a perfect addition to a little boy’s room.
If you liked this baseball bedroom side table-inspired post, you may also like:
Here are some more Furniture Flips that I think you’ll LOVE:
Thanks again, Stephanie! I love the inspiration behind this project. The table truly turned out to be something special!
