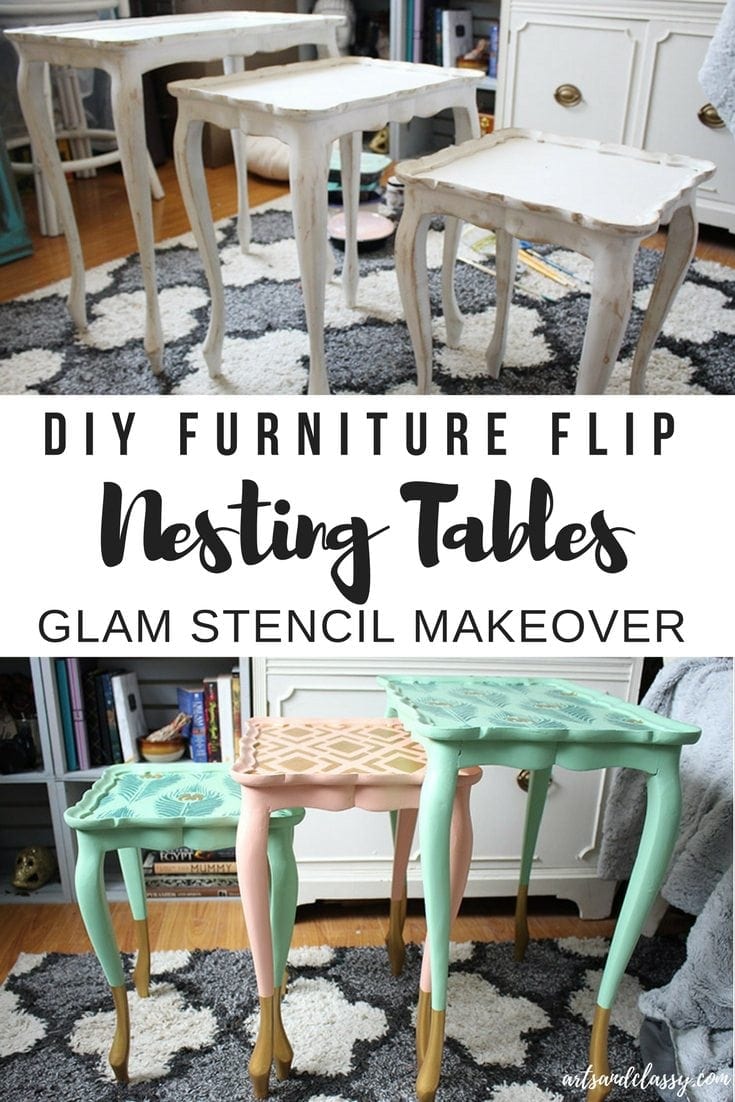
My Nesting Tables DIY Stencil Makeover
As someone who lives for thrift store treasure hunts and weekend flipping projects, I couldn’t resist a set of nesting tables that practically begged for a makeover. They had great bones but zero personality. With a little imagination and some playful stenciling, this nesting tables DIY project turned into one of my favorite transformations — especially if you’re craving that shabby chic painted furniture charm without paying designer prices.
Key Takeaways
- A simple stencil and a few paint supplies can completely transform thrifted nesting tables — giving you a high-end, custom look without spending a fortune. This nesting tables DIY project is perfect if you’re obsessed with shabby chic painted furniture and love breathing new life into thrifted finds.

Why This DIY Makeover Works (and Why I Chose Stencils)
Breathing New Life into Old Furniture
Upcycling is my happy place! Especially when it lets me turn a small, overlooked piece into something that feels heirloom-worthy and handmade. Nesting tables are already a functional dream, but pairing them with the right stencil and finish gives you those classic shabby chic painted furniture vibes instantly. It’s an inexpensive way to get a stylish, layered look that feels intentional and unique.
Stencils + Paint = Endless Possibility
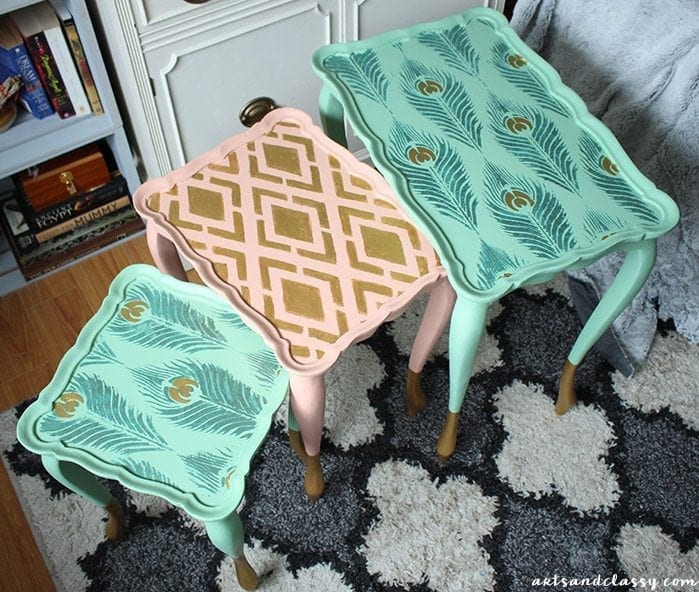
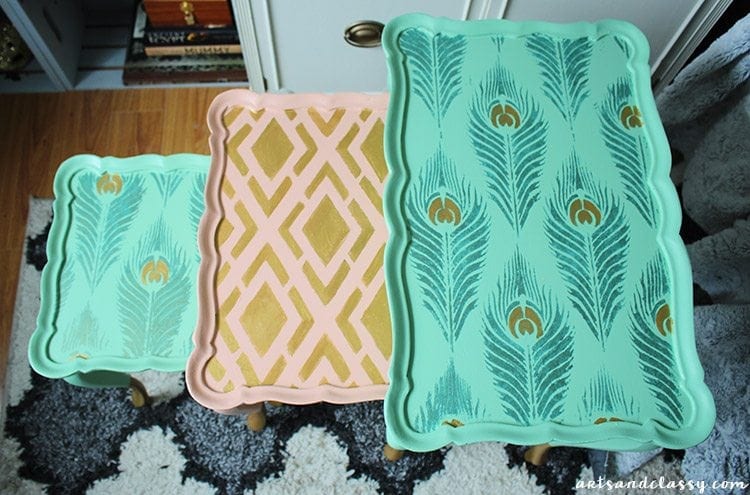
Stenciling gives you that detailed, curated feel even if you’re not a freehand artist. That’s why it’s such a great technique for a nesting tables DIY makeover. I used a pair of complementary stencils, including a peacock feather design and a geometric pattern, to create a layered look that gives depth, texture, and a little shimmer. It’s exactly the kind of detail that elevates humble thrifted pieces into shabby chic painted furniture showstoppers.
What You’ll Need for This Project
This post contains some affiliate links. I may earn a small commission if you purchase through one of these links. See more information in my full disclosure policy.
Supplies & Paint List
- Two or more coordinating paint colors — I used a soft blue-green and a coral shade. No primer is needed as the paint I used included a paint and primer in one. However, if you choose to work on a dark wood piece of furniture, you will want to use a stain blocker before the first coat of paint; otherwise, the stain will bleed through.
- The brand I used is Behr Paint because it’s good quality paint – In colors Brookview and California Coral for my shabby chic furniture paint.
- Chalk-style or matte furniture paint (or regular paint, depending on what you have). This is the perfect kind of paint for a shabby chic look.
- DIY Chalk paint ingredients using any latex paint you have – Plaster of Paris + warm water (check out the directions to make your own chalk paint)
- Paint brushes
- Stencils: I used a feather (peacock) design and a geometric pattern.
- Cutting Edge Stencils – Peacock Feathers All Over + Geometric pattern.
- Stencil paintbrush (a round, firm-bristled brush works great) or stencil roller.
- Royal stenciling creme – Patina Green
- Modern Masters Paint – Metallic Olympic Gold
- Painter’s tape to hold stencils in place, or you could use Frog Tape
- Drop cloth, water for cleaning, and rags or paper plates for your paint palette.
- Furniture Wax to protect the finished piece, or you could use a varnish for a top coat.

The Step-by-Step Makeover Process
Step 1 – Prep + Choose Your Base Colors
First, if you want to do some surface preparation, you can with grit sandpaper and wiping down the furniture with a lint-free rag to remove dust and degreasing if necessary. However, what I love about chalk paint is that it has a good grip, so no sanding is required. If repairs are needed or holes need to be filled, then taking care of this during prep is essential.
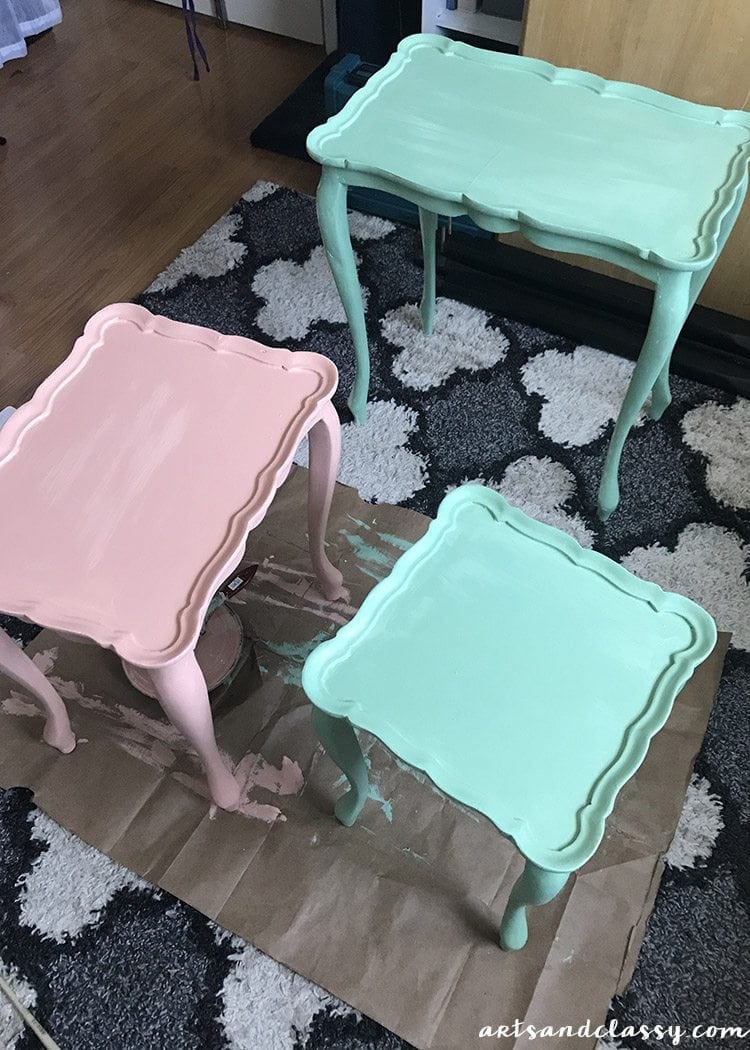
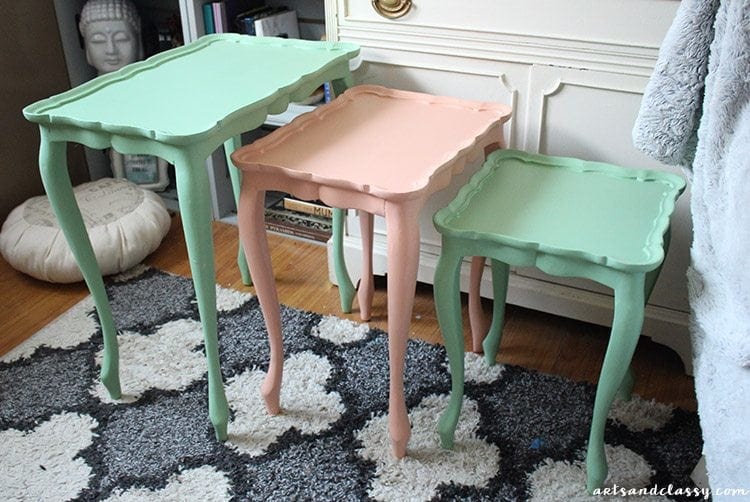
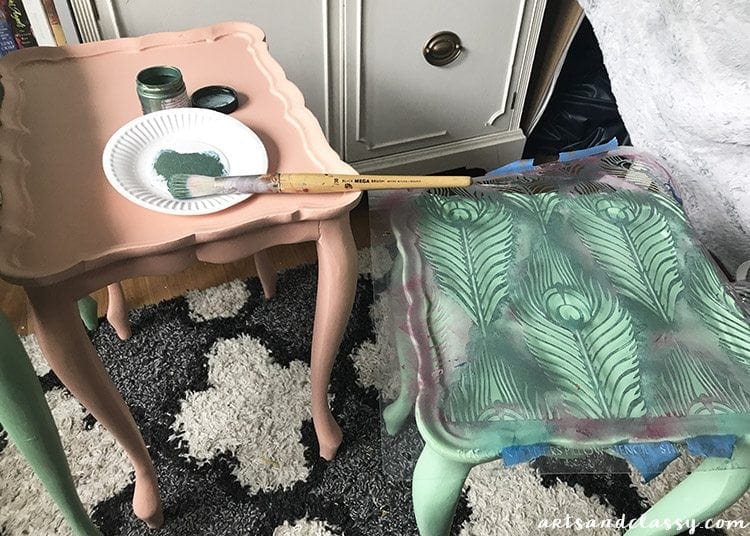
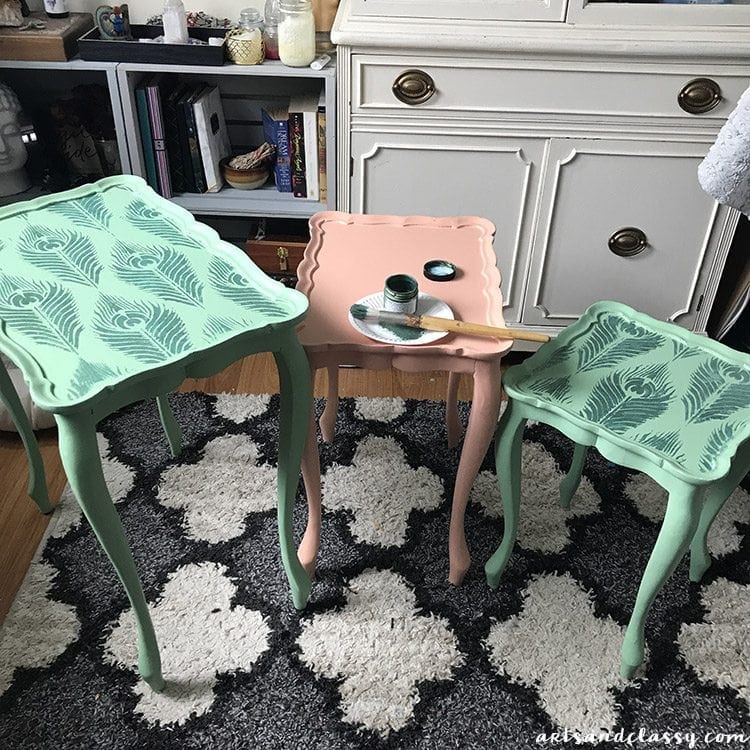
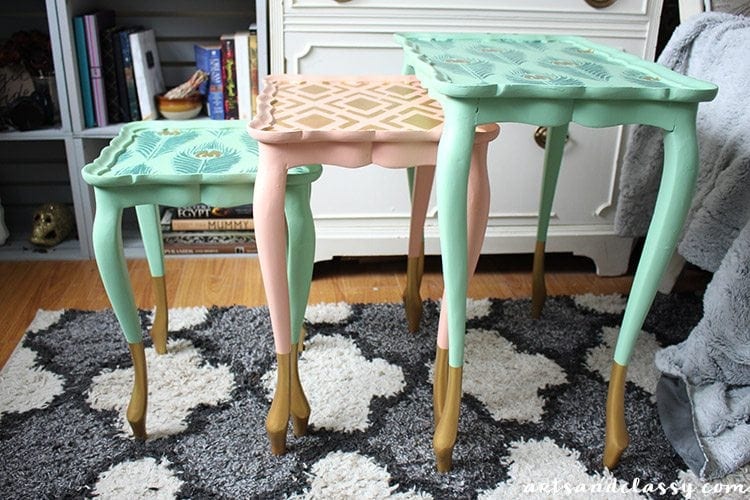
I painted each nesting table in my chosen base colors. I made the largest and smallest tables the same teal/blue-green shade, and used a warm coral for the middle table. It took two coats for coverage, which gave me a clean, even finish as my foundation. The second layer of paint assured that everything was covered and that these wouldn’t easily chip or peel. I used these colors on my previous diy painted furniture end table project.
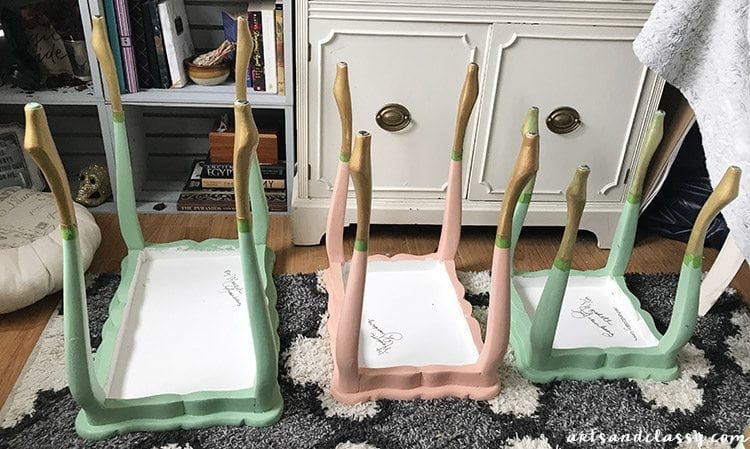
Step 2 – Add a Dipped Leg Effect
Here is the fun part! Painter’s tape + a little metallic gold paint = instant glam. Gold-dipped legs add just the right amount of polish and make the tables feel expensive without losing the soft charm of shabby chic painted furniture.
Step 3 – Time to Stencil
Here’s where the magic happens… through creativity. I carefully positioned my peacock feather stencil on the top of the largest table, and then taped it down securely using painter’s tape. With a stencil brush, I dabbed on a contrasting color (a muted green) to fill in the pattern.
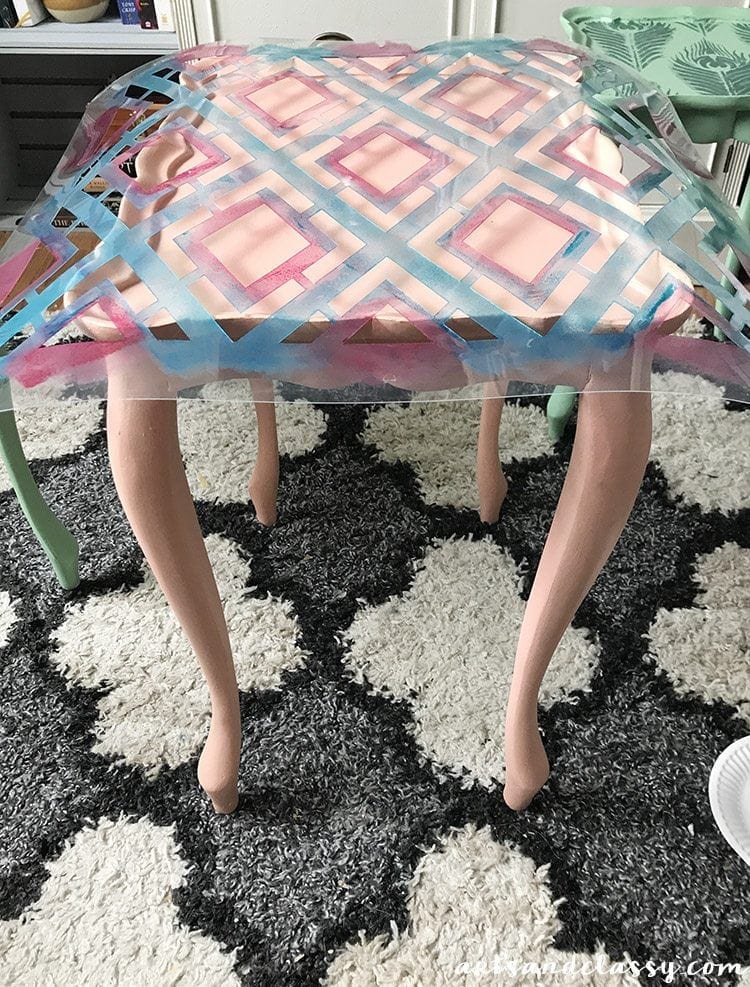
Once that stencil dried, I moved on to the geometric design on the middle table, layering gold metallic paint. Adding the metallic paint through the stencil gave just enough shine to make the design pop without overpowering the base color.Its a nice blend of shabby chic style and glam.


Stenciling Tips for Success
- Use a dry brush technique: less paint on your brush means cleaner lines and less bleed. You can also give it a distressed effect with the amount of pressure you use when applying the paint.
- Work in light layers — build up the design gradually rather than trying to get full coverage in one pass.
- If your stencil shifts, tap it back into place and wipe off excess paint before reapplying.
Step 4 – Finishing Touches & Sealing
Once all the stenciled paint was dry, I sealed the tables with a clear topcoat to protect the design and add durability. A satin or matte finish works beautifully for this kind of project — it keeps the handmade feel but adds protection for everyday use.
Why I Love This Project — And You Might Too
Affordable Custom Design
This makeover proves you don’t need to spend big bucks on designer furniture to get a custom look. A couple of good stencils, some paint, and a few hours can totally transform these nesting tables into a statement piece.
Beginner-Friendly but Flexible
Whether you’re totally new to upcycling or you’ve painted furniture dozens of times, this project is super friendly. Stenciling gives you structure, but you can make it as simple or as detailed as you like. Plus, you can always layer or tweak your design over time.
Built to Last
By sealing with a durable topcoat, you protect your work so the tables can be functional — not just pretty. Use them for books, decor, or as stylish side tables; they’ll hold up just fine.
Stenciling Tips from Real Pros (Backed by Experts)
Techniques That Make a Difference
- Use painter’s tape or low-tack spray adhesive to keep stencils from slipping.
- Load your stencil brush lightly, offloading excess on a paper plate before applying. This helps prevent blotchy or bleeding edges.
- Apply paint in a pouncing or up-and-down motion, not back-and-forth — that builds up a pattern without over-saturating.
- Clean your stencil after each use to maintain crisp lines.
Where I Put My Finished Nesting Tables — And How I Use Them
Styling Ideas for Your Makeover
These stenciled nesting tables ended up in my living room, next to a cozy chair and under a sleek lamp. But they’re honestly flexible — you could use them in:
- A reading nook (one table nests under another when not in use)
- A small apartment hallway (to add texture without overwhelming)
- As bedside tables for a creative and unexpected twist on typical nightstands
Care & Maintenance Tips
To keep your stencil design crisp and clean:
- Use a soft, damp cloth for regular dusting
- Avoid harsh chemical cleaners; mild soap or wood-safe cleaner is ideal
- Periodically check the topcoat; if it starts to wear, you can lightly reapply or touch up
Final Thoughts: A Project Worth Trying
Upcycling a piece of furniture is one of my very favorite ways to bring personality into a space. This nesting tables makeover was so satisfying because it pushed me creatively (hello, layering stencils!) and gave me a piece that feels designed, not just painted.
If you’ve got a pair of old tables in the corner (or half-forgotten secondhand finds), give them a second life. It’s totally doable, budget-friendly, and surprisingly relaxing to stencil your way to something beautiful.
So don’t let the opportunities pass by – get out there and give those tables the ultimate makeover! If you need any inspiration or are looking for more furniture flips, make sure you are following me on Hometalk, Instagram, Pinterest, and TikTok for more ideas.
With this knowledge at your fingertips and an inspired skillset to tackle any upcycle challenge head-on, go forth fearlessly with confidence and make sure your home projects shine! What do you think of these nesting tables? Where would you put them in your home? I would love to know! Let me know in the comments below.
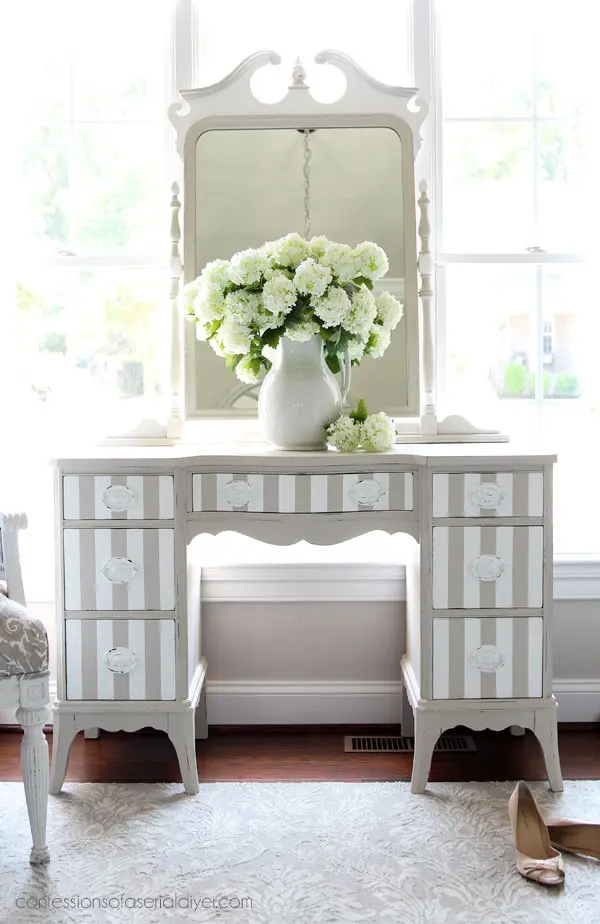
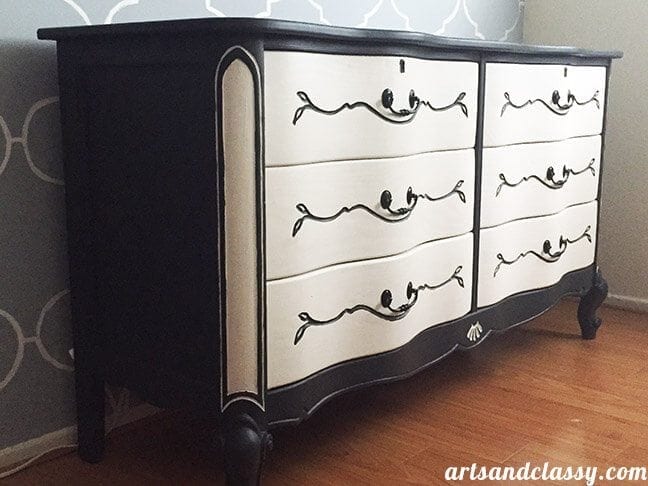
Make sure you check out these tutorials if you enjoy this one.


Finally some unique DIY table ideas! Couldn’t thank you enough with these, definitely a must-try list! Thank you so much for sharing this creative DIY projects, looking forward to more ideas!
Finally some unique DIY table ideas! Couldn’t thank you enough with these, definitely a must-try list! Thank you so much for sharing this creative DIY projects, looking forward to more ideas!